As the pandemic gradually fades away, the dream of travelling abroad becomes a reality once again! This time, I’ve decided to explore one of the world’s ancient civilizations—Egypt. Are you also planning a trip to this mysterious and beautiful country? Don’t worry! This post provides a detailed guide on how to apply for an Egypt e-Visa, making the online application process easy and stress-free!
Why Choose an Egypt e-Visa?
Egypt, as a popular tourist destination, offers both visa-on-arrival and e-Visa options to visitors from many countries. The e-Visa is the more convenient option, as the entire application process can be completed online by filling out a form and paying the visa fee, taking only about 30 minutes.
Need to check if your passport requires a visa in Egypt? You can check the Egypt e-Visa official website’s Q&A.
How to Apply for an Egypt e-Visa?
Step 1: Visit the Official Website
Go to the Arab Republic of Egypt Electronic Visa Portal. This is the official website for visa applications. The fee for a single-entry visa is USD$25, while a multiple-entry visa is USD$60. Beware of fake visa websites that charge high processing fees, always ensure you are on the official website.
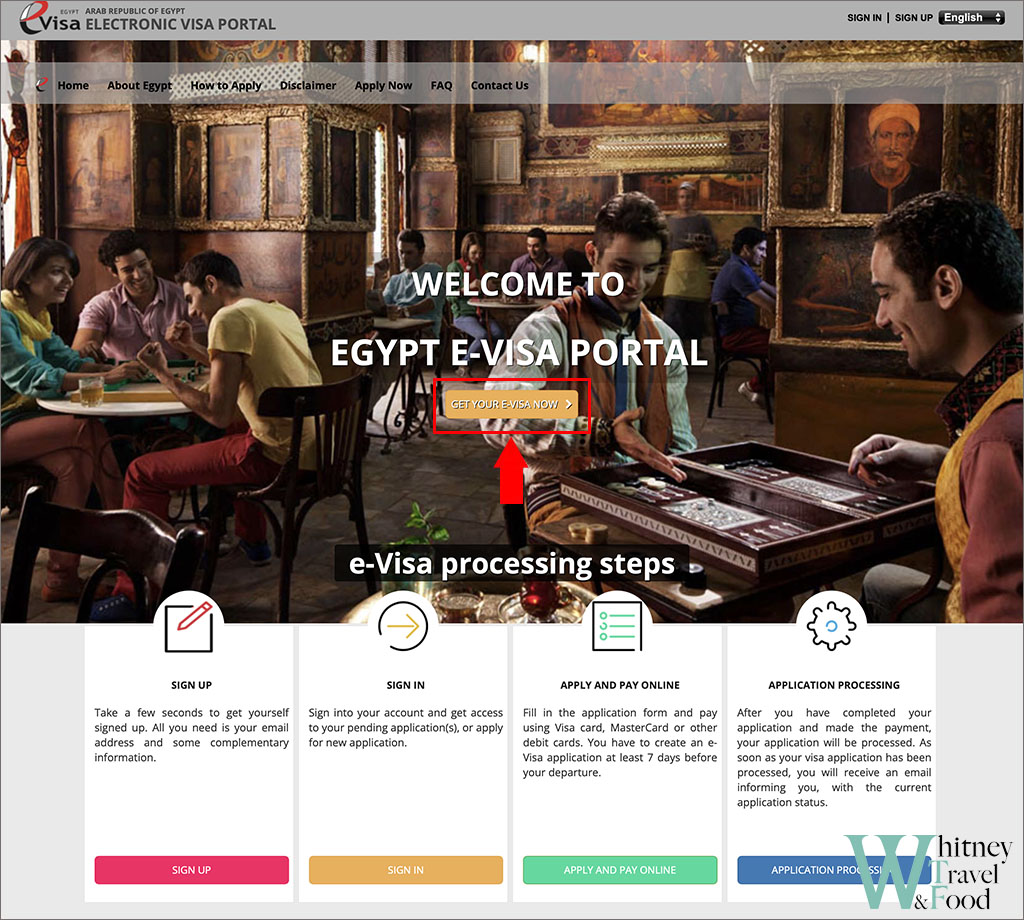
After accessing the official website, you can choose the language in the top right corner, then click GET YOUR E-VISA NOW to start the application process.
Step 2: Register an Account
Before applying for an Egypt e-Visa, you need to register an account on the official website. If you already have an account, you can skip to Step 3.
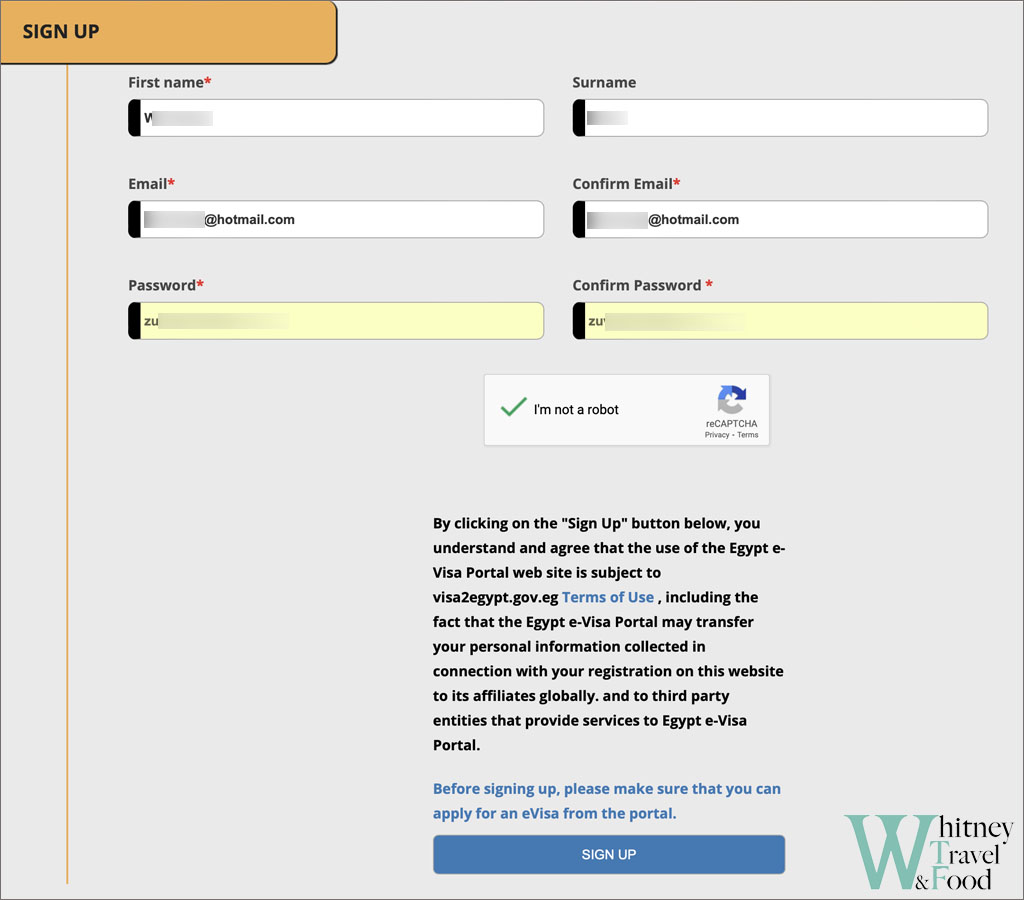
Enter your name, email address, and set a password, then click SIGN UP.

After registering, you will need to verify your email address.
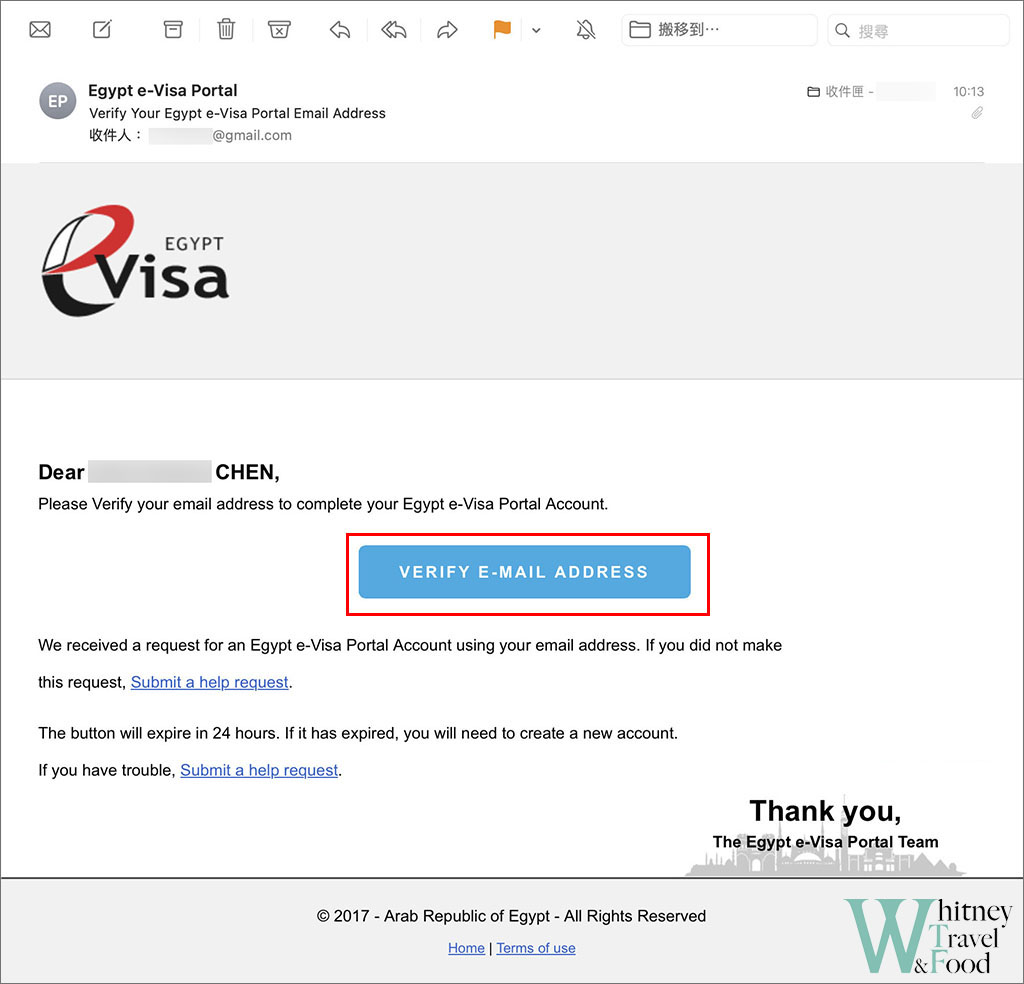
If you don’t receive the verification email, check your spam folder or ensure your email address is spelled correctly.

Once your email is verified, click APPLY NOW.
Step 3: Fill Out the Visa Application Form
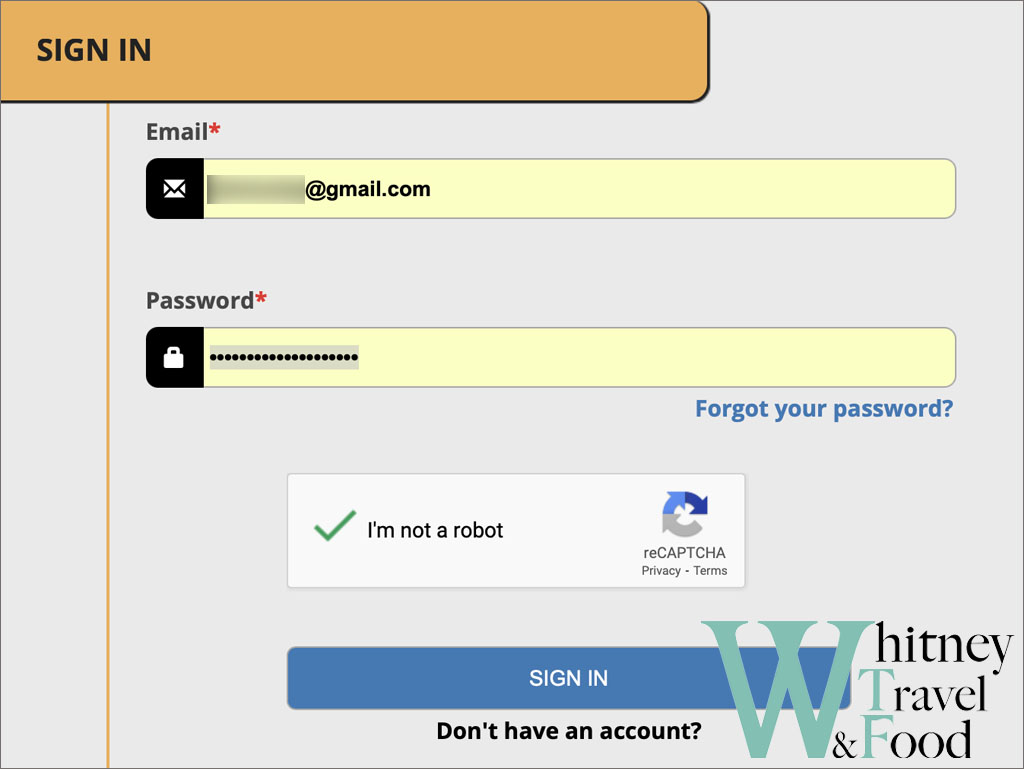
Log in to the account.

You’ll see the dashboard where you can start a CREATE NEW APPLICATION.
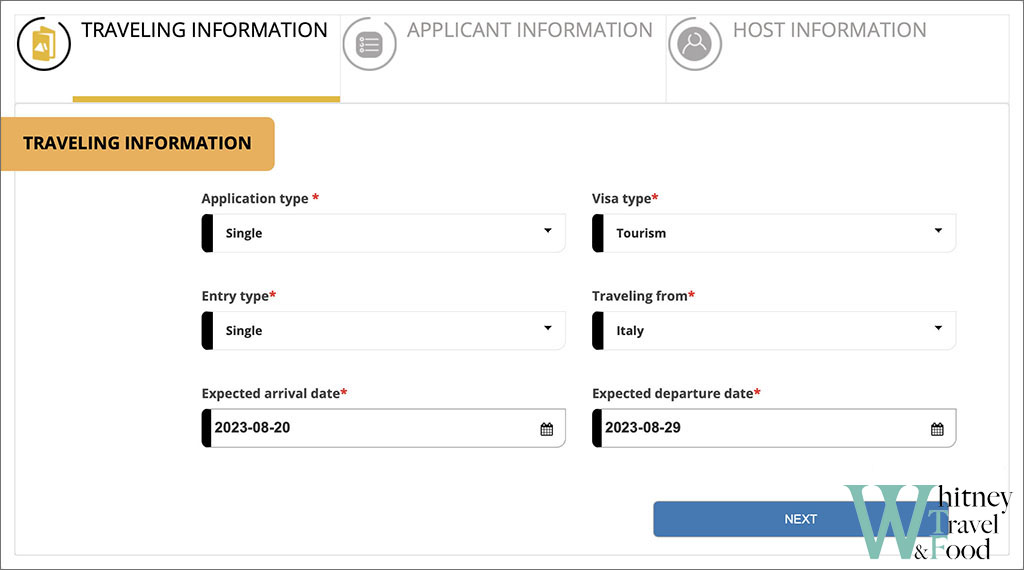
I applied for a single-entry visa, flying in from Italy, so you can refer to my form as a guide.

Filling out the form is straight forward, but here are some tips to keep in mind:
- Do not use any punctuation when filling out your address—use spaces instead.
- When uploading your passport picture, the file name must only contain English letters or numbers, no special characters. The file size must be under 1MB and in JPG or PNG format.
- If you’re travelling with friends, you can include their information on the same application form.
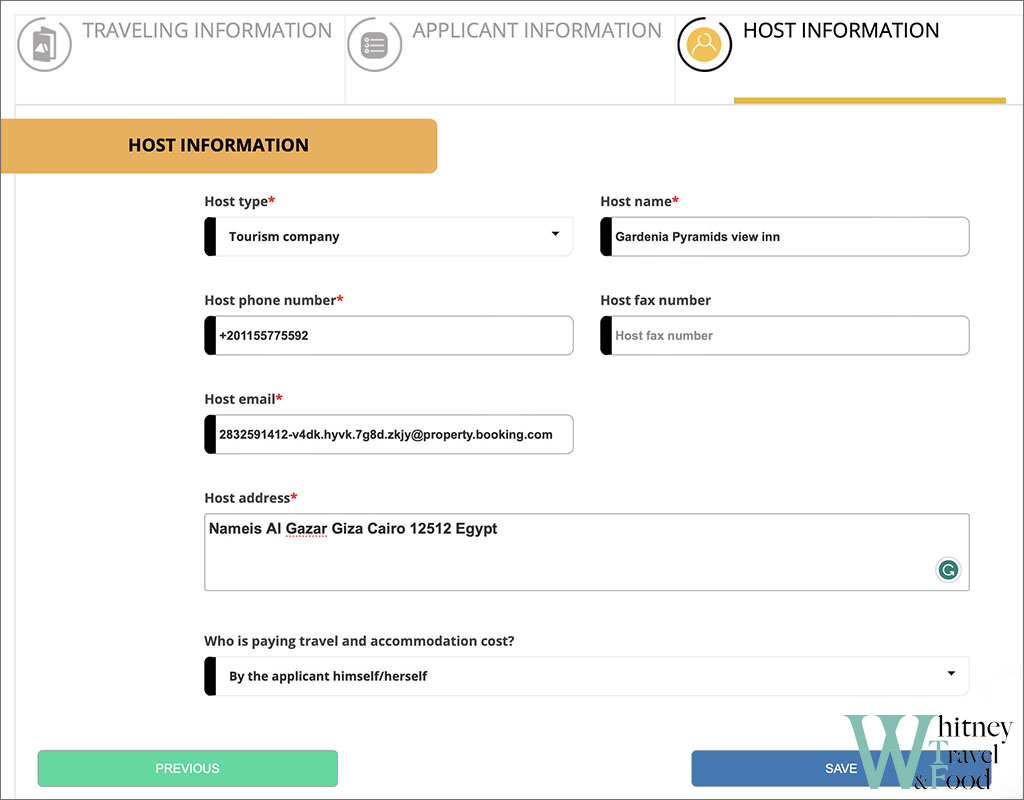
Next, fill in your hotel address—remember, no punctuation—and save your application once you’re done
Step 4: Double Check Your Application Details
After completing the application form, the next step is to double-check all your details for any wrong.
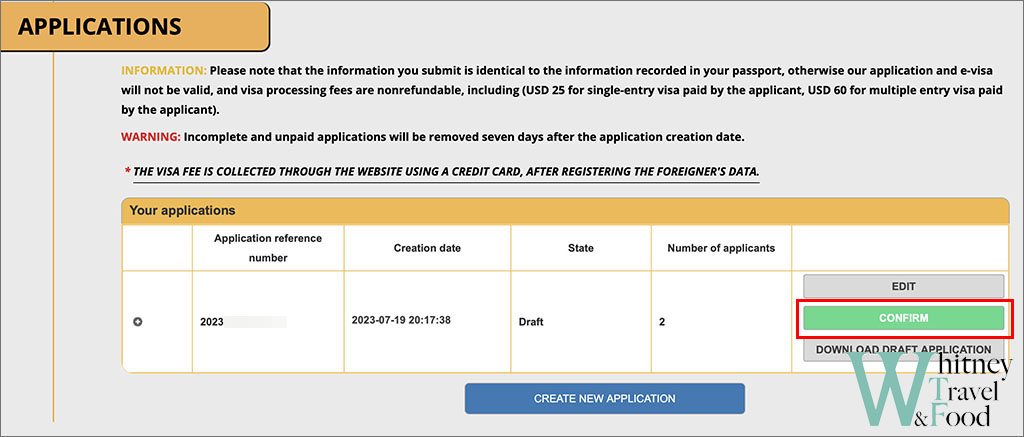
You can check the DOWNLOAD DRAFT APPLICATION to download and review your application for mistakes. If you find any mistakes, click EDIT to make changes. If everything looks correct, click the green CONFIRM button to finalize your application.
Note: Once you click CONFIRM, you cannot make any changes, so make sure your details are correct before confirming.
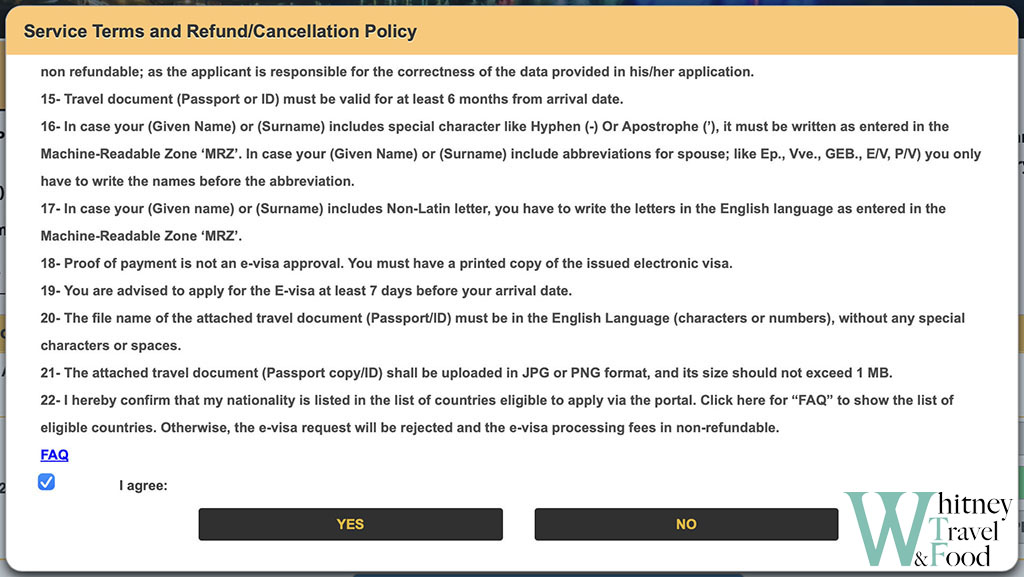
You will then be prompted to agree to the terms. Check the I agree box and click YES.
Step 5: Pay the Visa Fee
Once your application is confirmed, the final step is payment. Have your credit card ready.
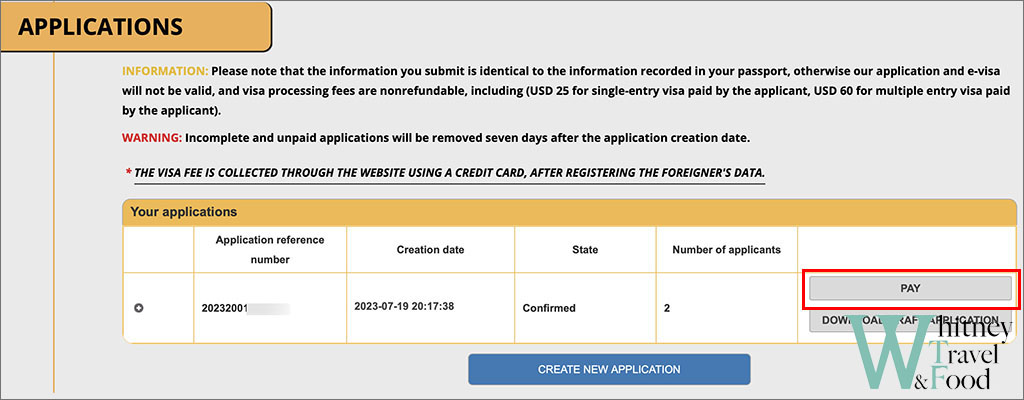
Click PAY to proceed with the payment.
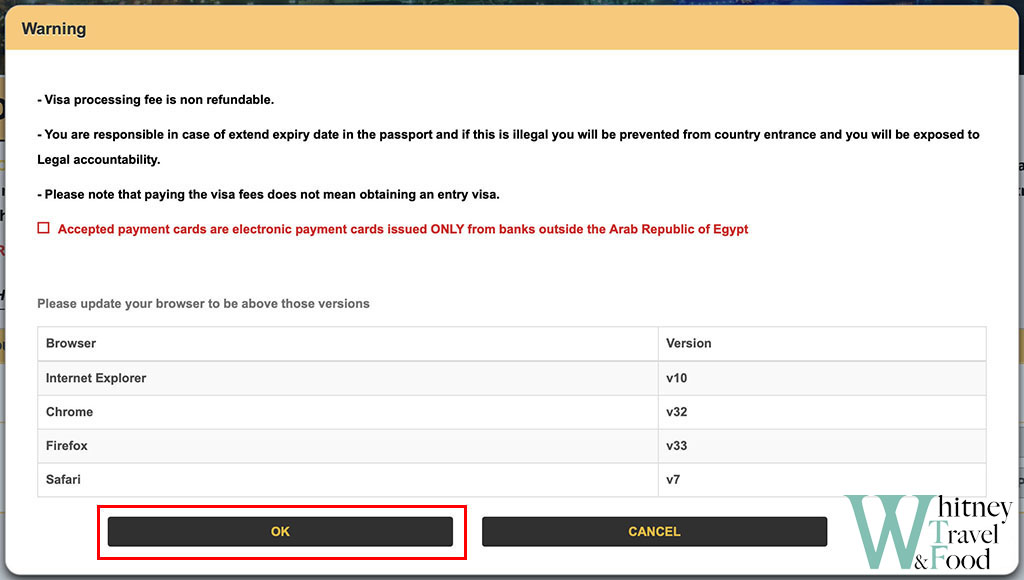
If everything looks correct, click OK to continue.
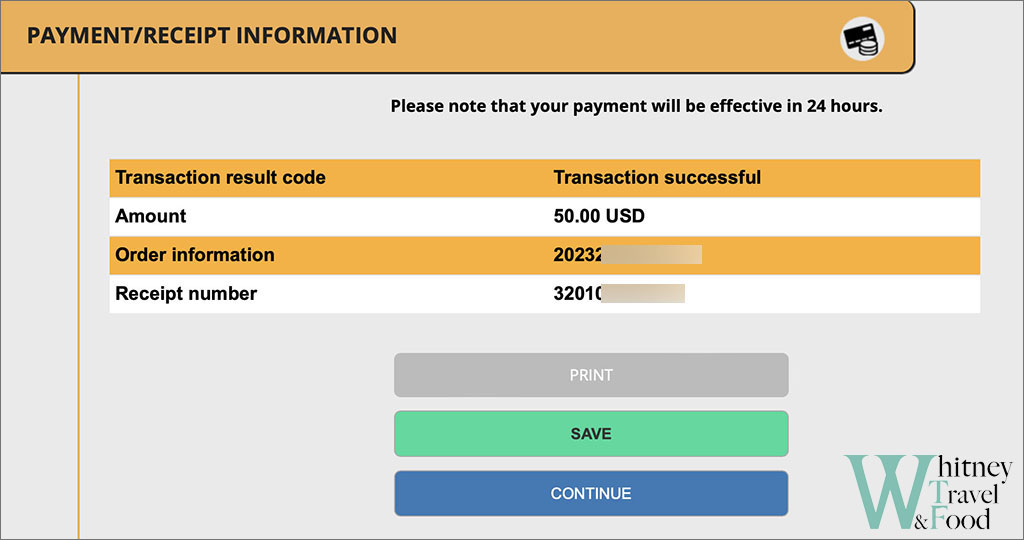
You’ll then enter your credit card details to complete the payment. Since our application was for two people with a single-entry visa, the total was $50 USD. After a successful payment, click CONTINUE to move on.

You will then see your application status marked as Application Progressing. Over the next few days, keep an eye on your email for the application notification. If you haven’t received your e-Visa after several days, you can log in to the website to check your application status.
Receiving Your e-Visa
A couple of days after payment, I received an email confirming that my visa was approved, with a PDF attachment of the e-Visa. Print this document—either black and white or colour is fine—and present it along with your passport at customs when you arrive in Egypt.
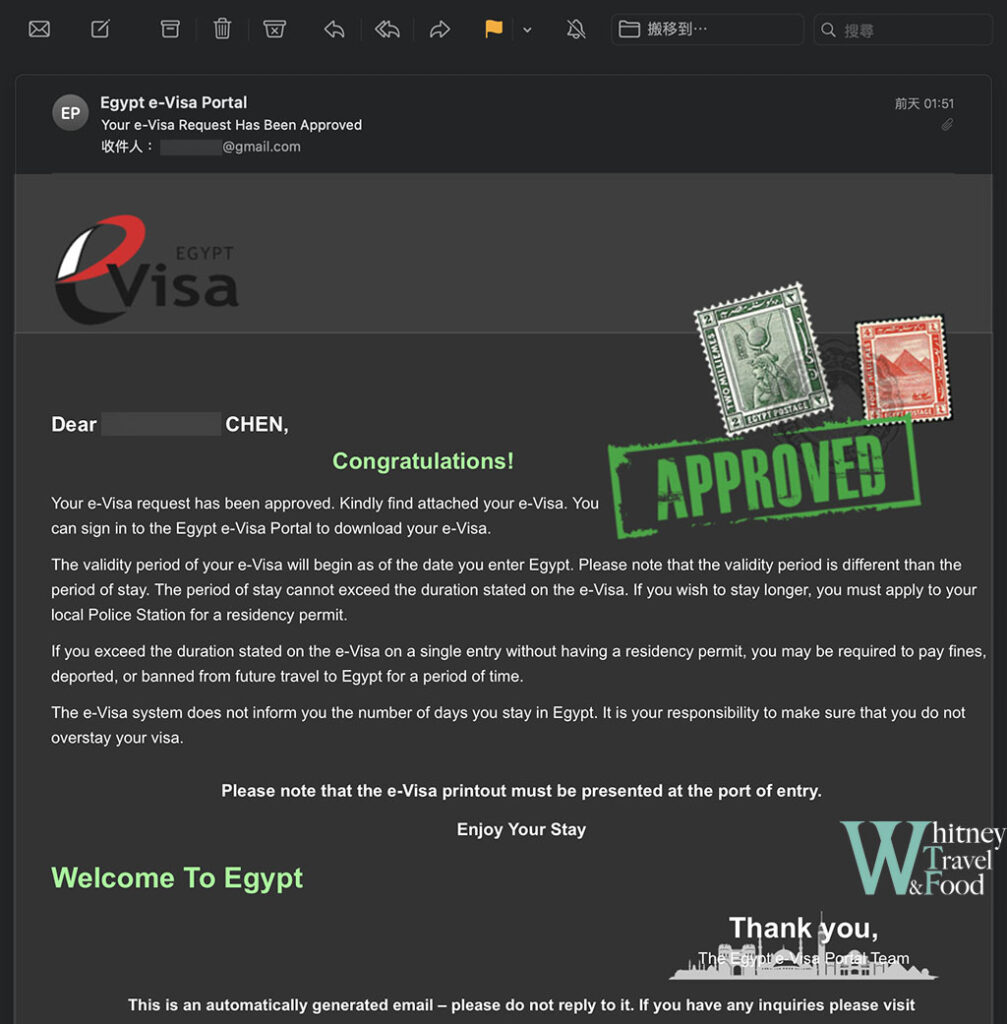
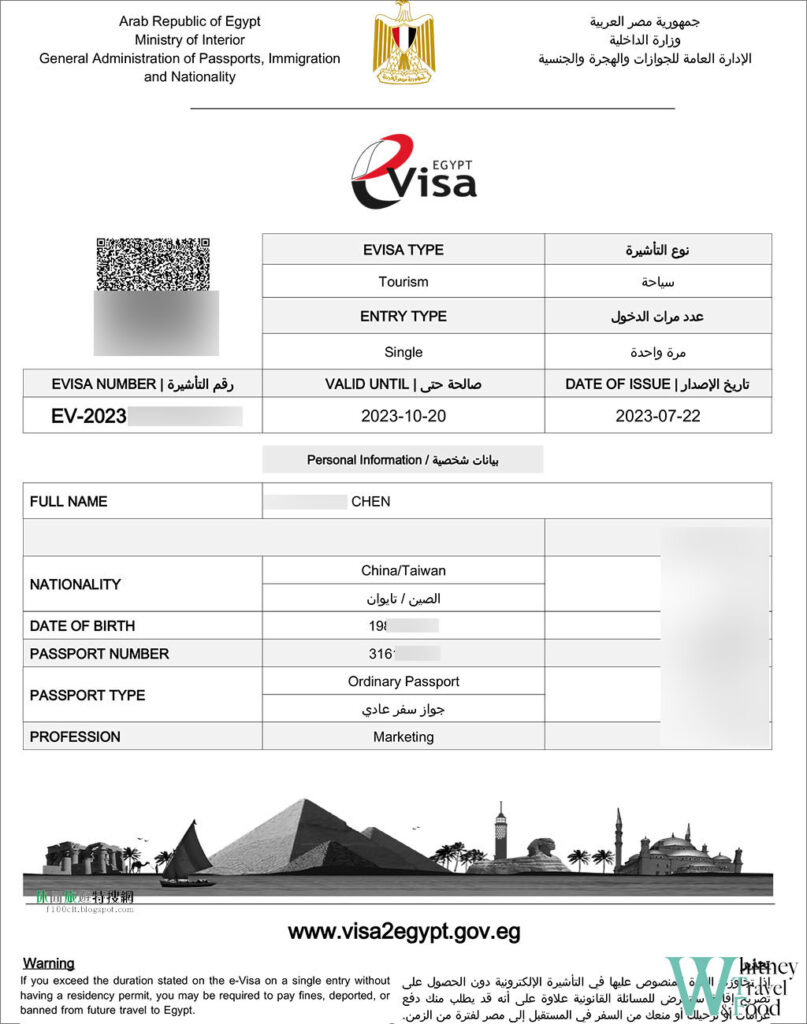
The attached PDF file
This is the complete process for applying for an Egypt e-Visa. If you forget to apply for the e-Visa before departure, don’t worry—you can still get a visa on arrival in Egypt. However, I recommend applying in advance to avoid any hassle at the airport. I hope this guide helps you smoothly apply for your Egyptian visa, and I wish you a wonderful trip to Egypt!
Thank you for reading!
If you like my post🖋️
Feel free to buy me a coffee☕️
Your support is our motivation for creating!🥰


awesome