In the past, Vietnam Airlines offered budget tickets, but the hassle of applying for a visa always made me think twice! However, the Vietnamese government has taken steps to boost tourism after the pandemic. Starting August 15, 2023, they introduced an online application system for Vietnam e-visa, simplifying the process greatly.
How to Apply for an Vietnam e-Visa?
Step 1: Visit the Official Website
Vietnam National Electronic Visa system is the official website for visa applications. The fee for a single-entry visa is USD$25, while a multiple-entry visa is USD$50. Beware of fake visa websites that charge high processing fees; always ensure you are on the official website.
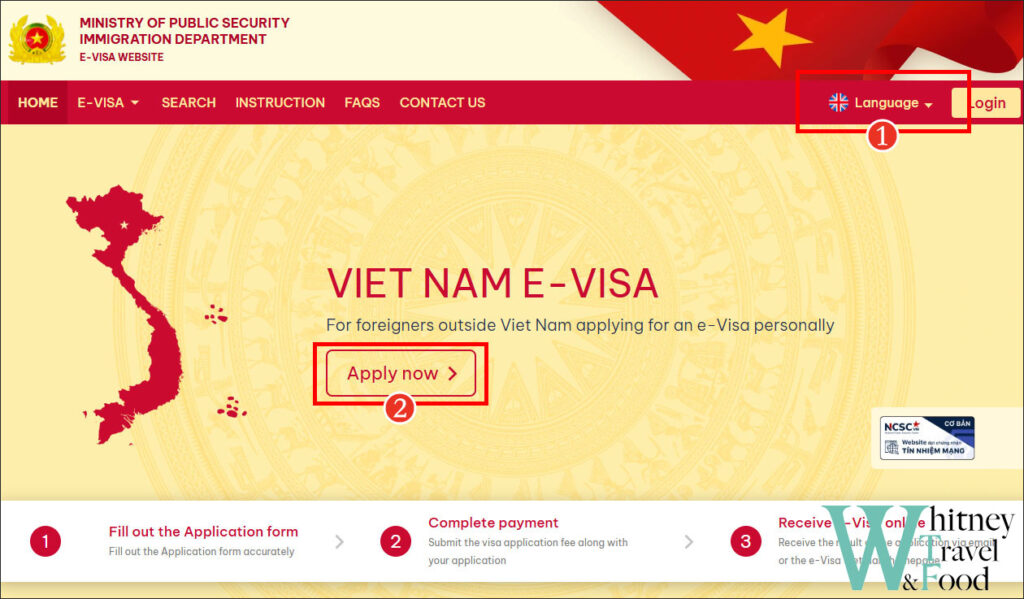
- Select the language: You can choose either Vietnamese or English.
- Click on Apply Now to start your application.
Step 2: Disclaimer (Note Window)
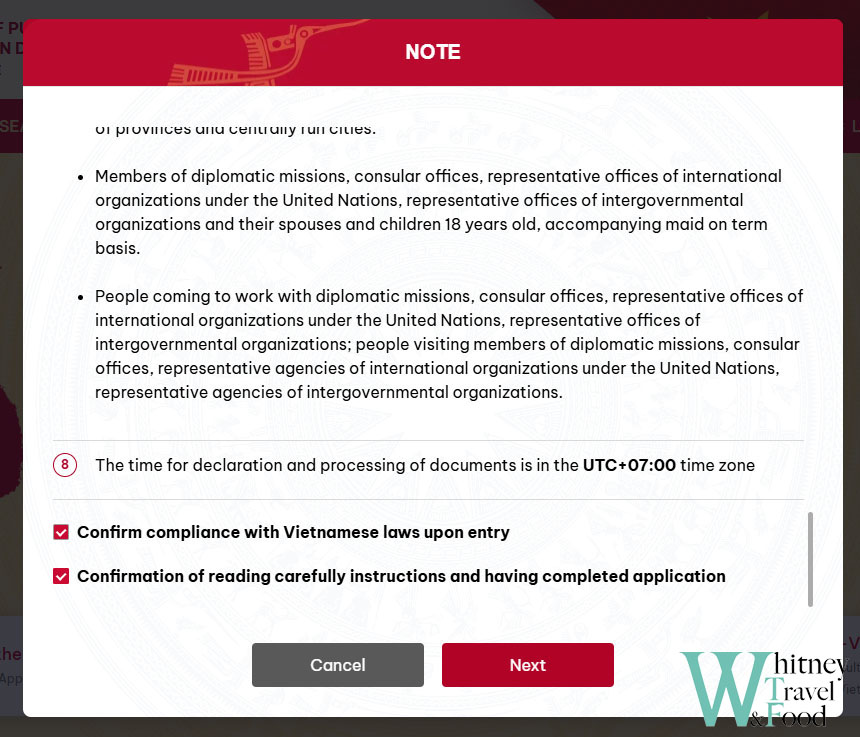
A window will then pop up providing details about the visa, including which entry and exit checkpoints in Vietnam are covered by the e-visa. Generally, it applies to land, sea, and air checkpoints. However, to be safe, it’s always best to double-check if your intended entry checkpoint is eligible.
Step 3: Fill Out the Visa Application Form
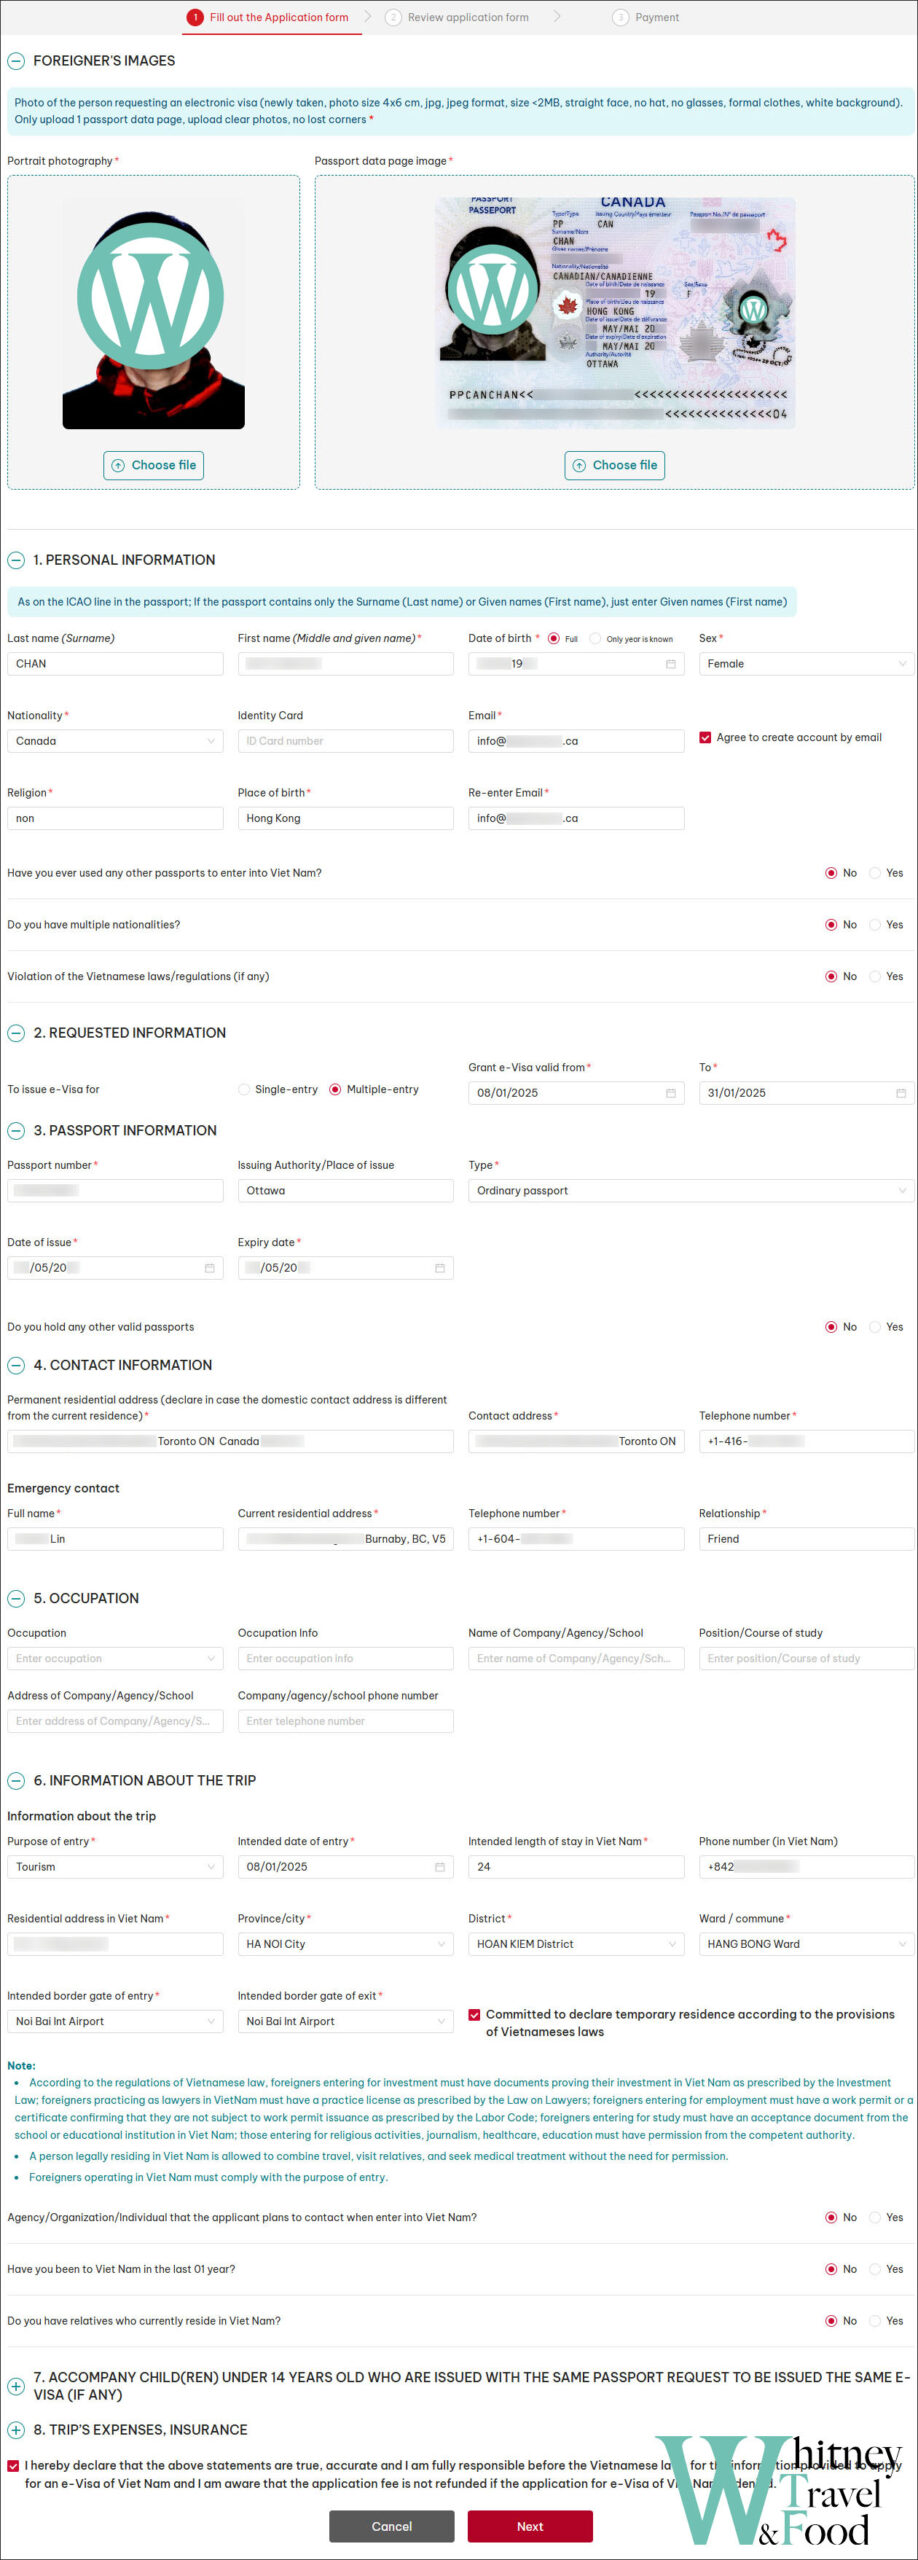
Filling out the visa application form is straightforward—it’s just a single page with basic questions. It’s recommended to fill out only the fields marked with an asterisk (*). Additionally, keep the following points in mind:
- You’ll need a digital passport photo and a scanned copy of your passport (the page with your photo).
- When entering your email, there will be an option to agree to create an account (“Agree to create account by email”). It’s recommended to check this box for easier access to your application in the future.
- Choose the correct type of visa: Single-entry or Multiple-entry. Be sure to select the right one, as the prices for these options are different.
- For Section 6, you’ll need to provide an address in Vietnam. You can use your hotel’s address.
Step 4: Double Check Your Application Details
Review the information carefully, and if everything is correct, click Confirm.
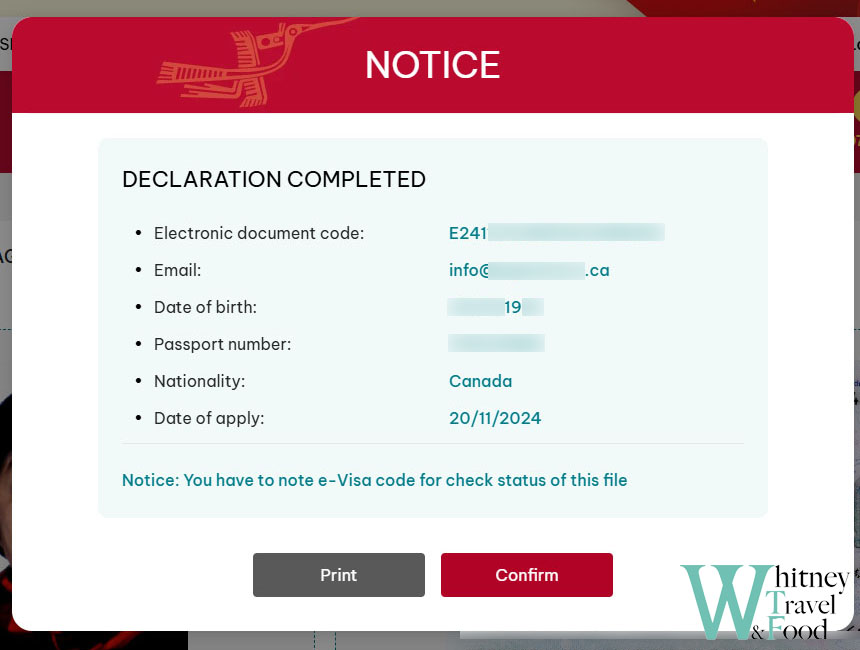
Step 5: Pay the Visa Fee
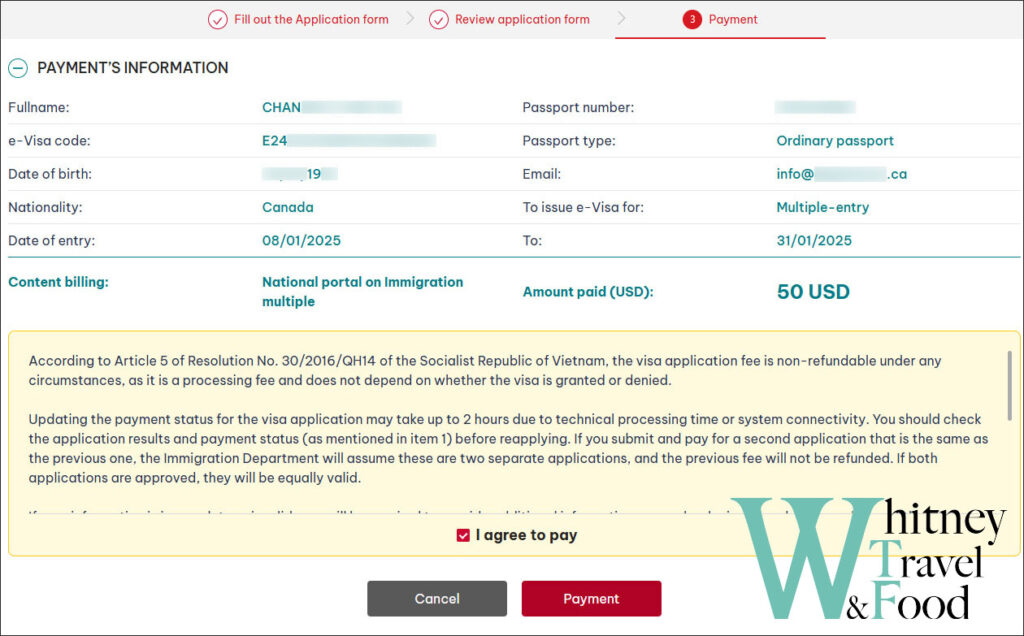
Once your application is confirmed, the final step is payment. Have your credit card ready.
- Single-entry is US$25
- Multiple-entry is US$50
Payment options include credit card or ATM card. Choose your preferred payment method and enter your card details. If everything is entered correctly, the payment will be processed successfully.
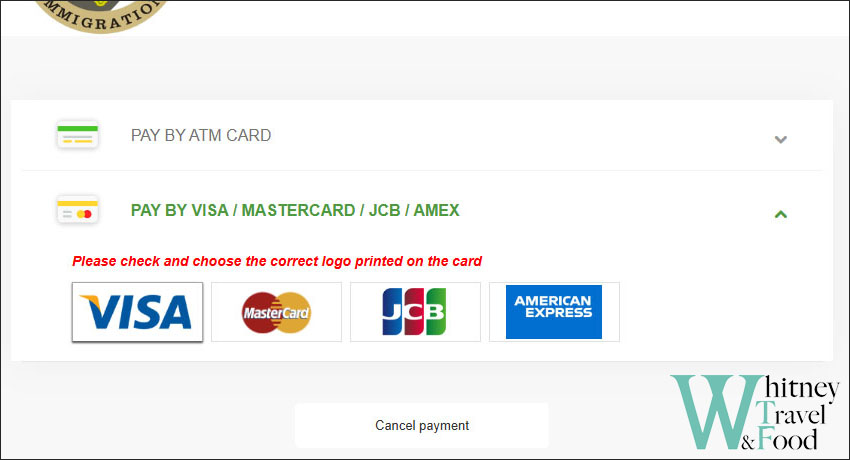
Step 5: Receive a Confirmation Email
If the payment is successful, you will receive a receipt email confirming that your e-visa application has been submitted and the payment has been completed.
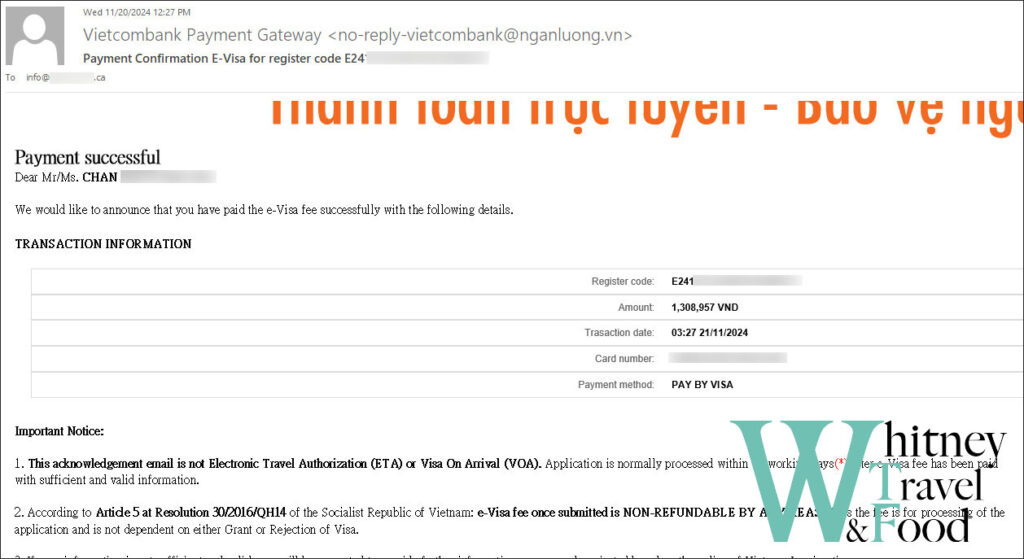
Check Application Status
If you selected the option to create an account during the visa application process, you should receive the following email:
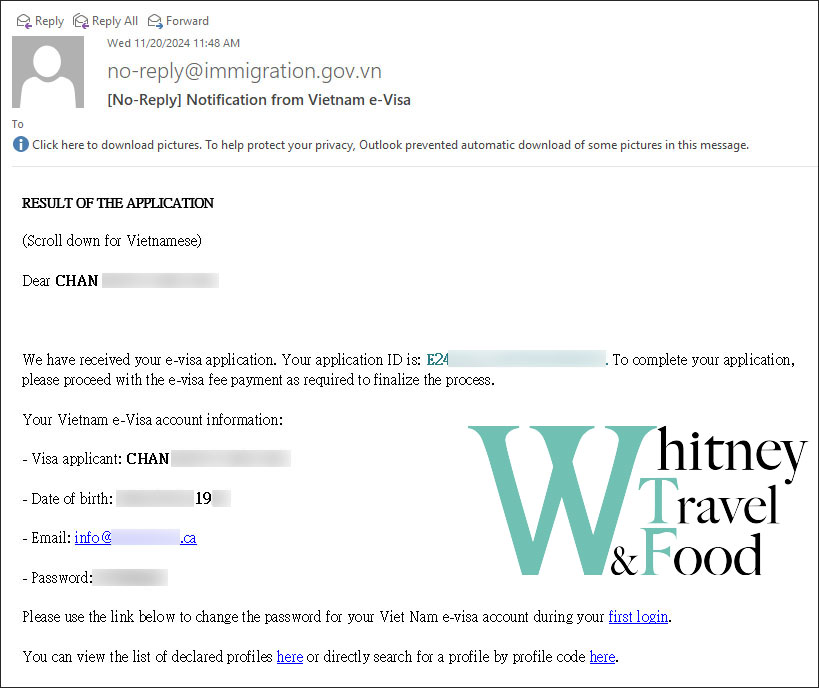
The email will include a password for accessing the dashboard. Once logged in, you can check the status of your visa application on the website. See below:
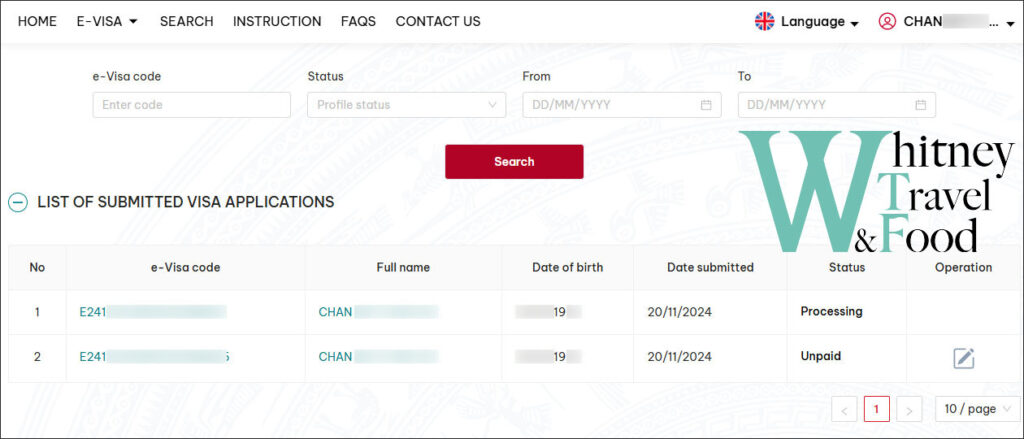
Receive and Print the E-Visa
About 3 business days after payment, you should receive an approval email with a PDF attachment of your e-visa. You can also log into the dashboard to download the e-visa directly.
Make sure to print out the e-visa and present it along with your passport to the immigration officer upon entry.
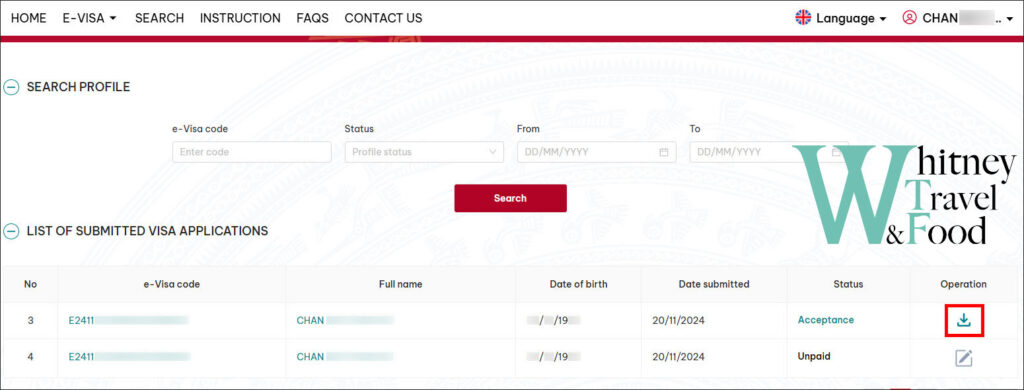
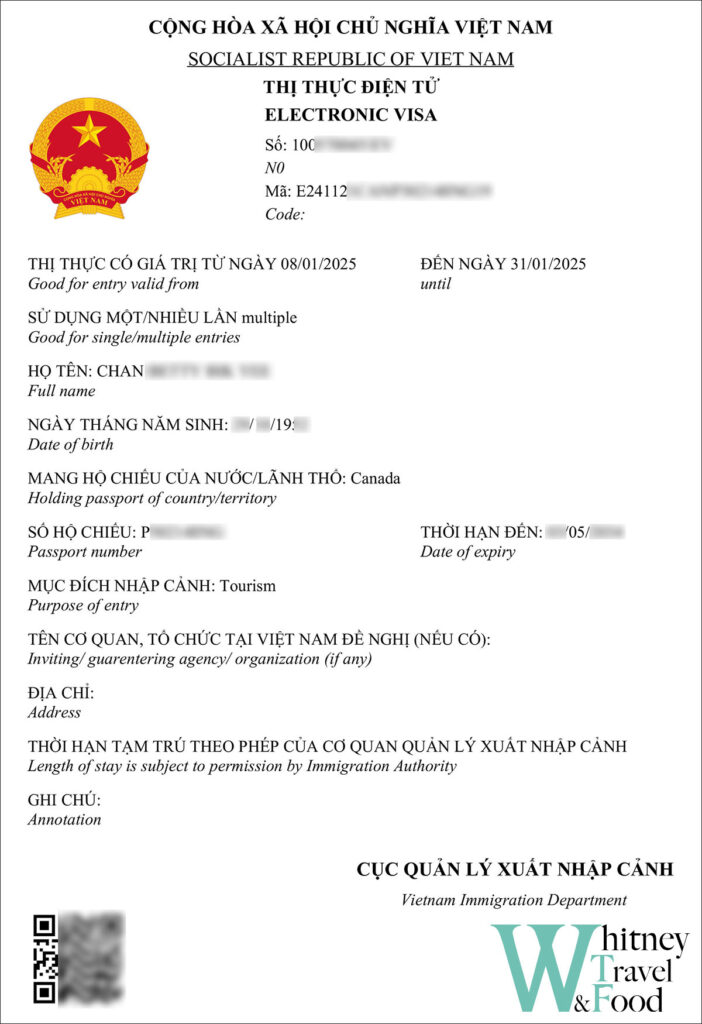
That’s the whole process for applying for a Vietnam e-visa. The application is straightforward, the form is simple to fill out, and approval is quick. I hope this guide helps you successfully obtain your Vietnam visa. Wishing you a wonderful trip to Vietnam!
Thank you for reading!
If you like my post🖋️
Feel free to buy me a coffee☕️
Your support is our motivation for creating!🥰


