One way to get Permanent Resident (PR) status in Canada is by having your common-law spouse sponsor you. This requires being in a common-law relationship with a Canadian citizen or permanent resident, and together going through the process of applying for sponsorship. Here are some details to get started if you’re planning to follow this path.
Note: This post is purely a record of our application process for reference. Please note that everyone’s circumstances and conditions may differ, and the details and final outcome of the application should be based on the official processing by IRCC.
- To get an idea of how long it will take for your application to be processed, you can visit the IRCC – Check processing times. This will give you the average time for your specific visa type.
- The process for applying for Common-Law is clearly outlined on the IRCC website. Visit IRCC – Sponsor your spouse, common-law partner, conjugal partner or dependent child – Complete Guide (IMM 5289) page for comprehensive information.
What is Common-Law?
Common-Law in Canada refers to a ‘marriage-like’ relationship that is legally recognized. Simply put, it is a relationship where two people live together as partners for over a year without officially getting married. Due to Canada’s inclusive and open culture, this type of cohabitation applies not only to opposite-sex couples but also to same-sex couples, who can also apply for Common-Law status.
How Does Common-Law Help Me Get a PR?
If you’re in a relationship with a Canadian citizen, and you reach common-law status, you may be eligible for sponsorship to become a permanent resident.
Eligibility for the Sponsor
- The sponsor must be a Canadian citizen or permanent resident aged 18 or older.
- If the sponsor is a Canadian citizen, the application can be submitted from abroad. If the sponsor is a permanent resident, the application must be submitted within Canada.
- Not receiving government social assistance (except for reasons of disability).
- Be able to provide sufficient financial proof to support the basic needs of the person being sponsored.
- Agree to take on the financial responsibility for the sponsored person after they become a permanent resident, including reimbursing any government assistance they receive during that time.
- For more detailed information, please refer to Sponsor your spouse, partner or children: check if you’re eligible
How to Apply for Sponsorship
Since everyone’s circumstances and conditions vary, the required documents for submission may also differ. It’s recommended to create an account in the Permanent Residence Portal and check what specific documents need to be uploaded. This way, you can prepare according to the system’s requirements.
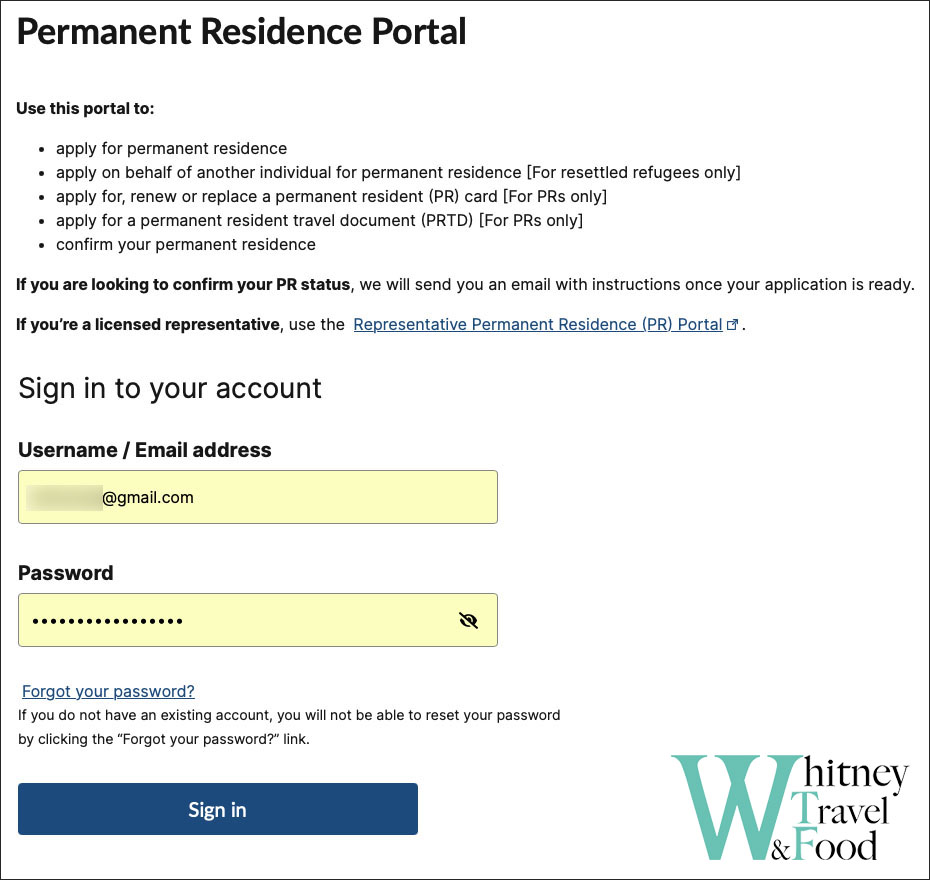
Log In or Create an Account on the PR Portal
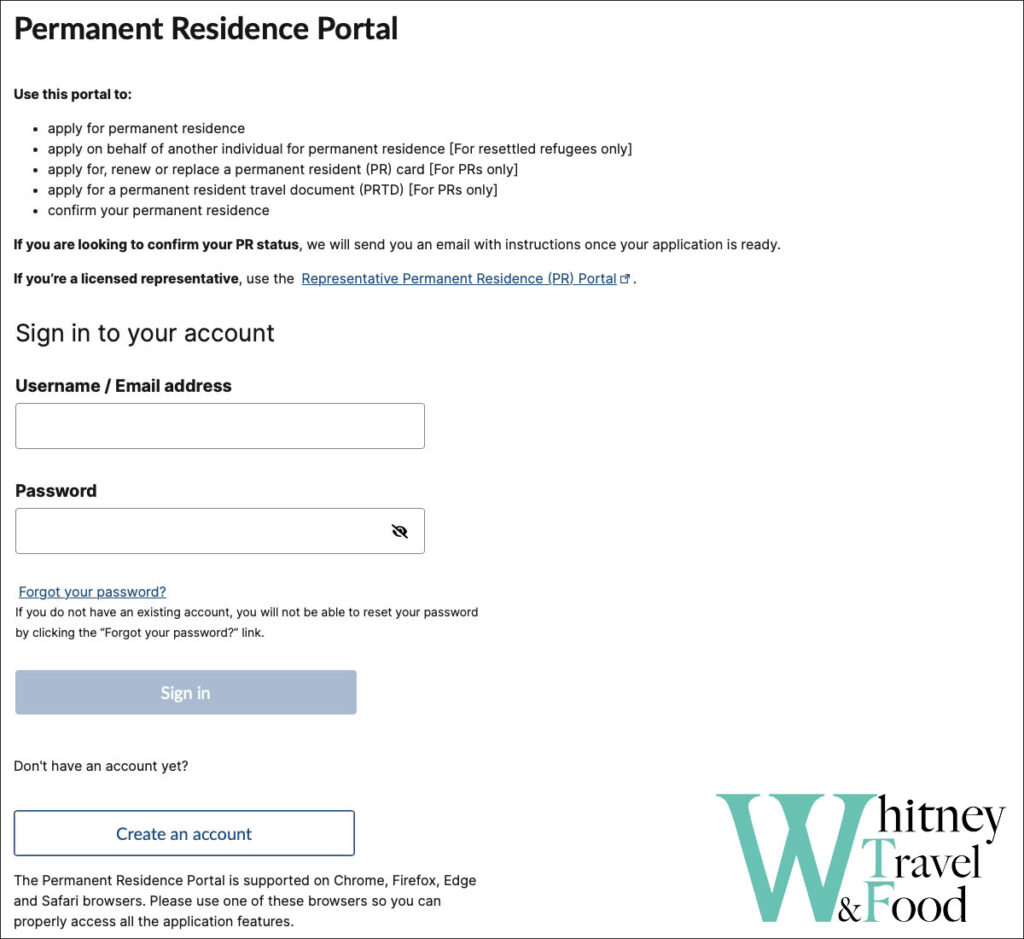
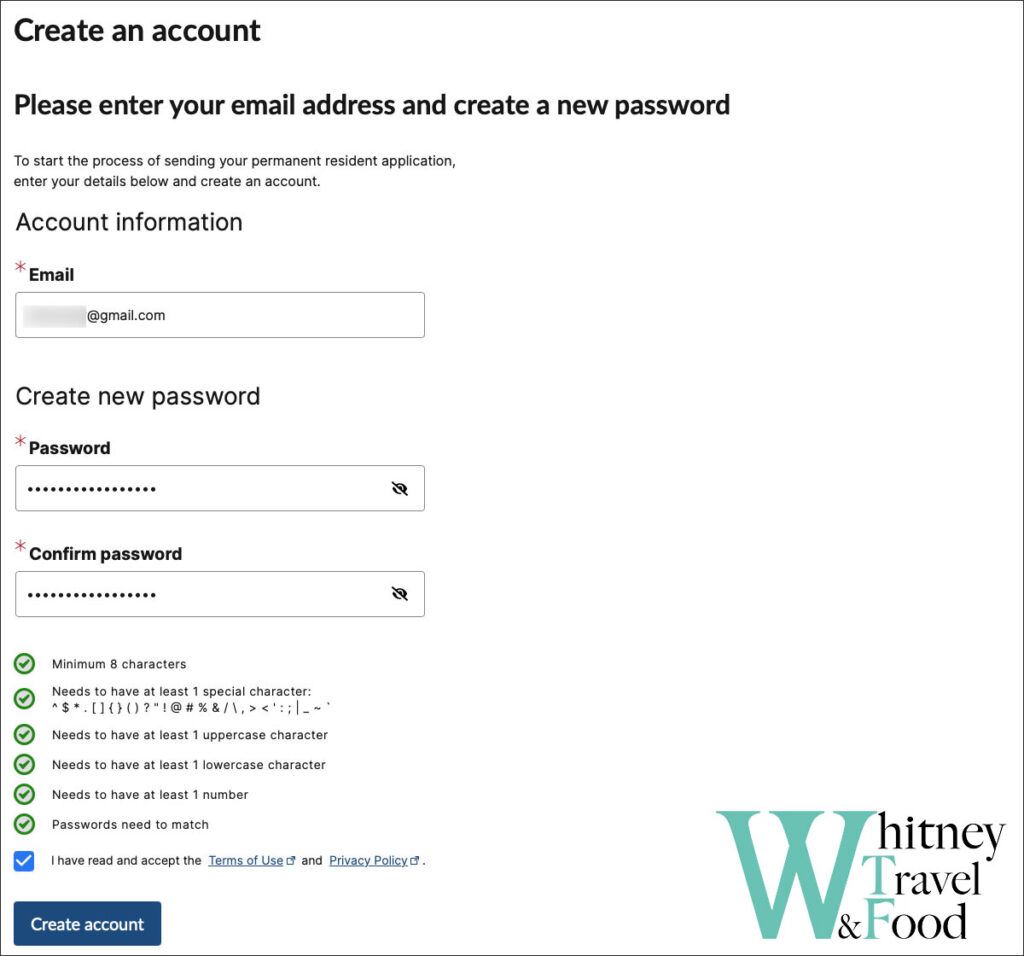
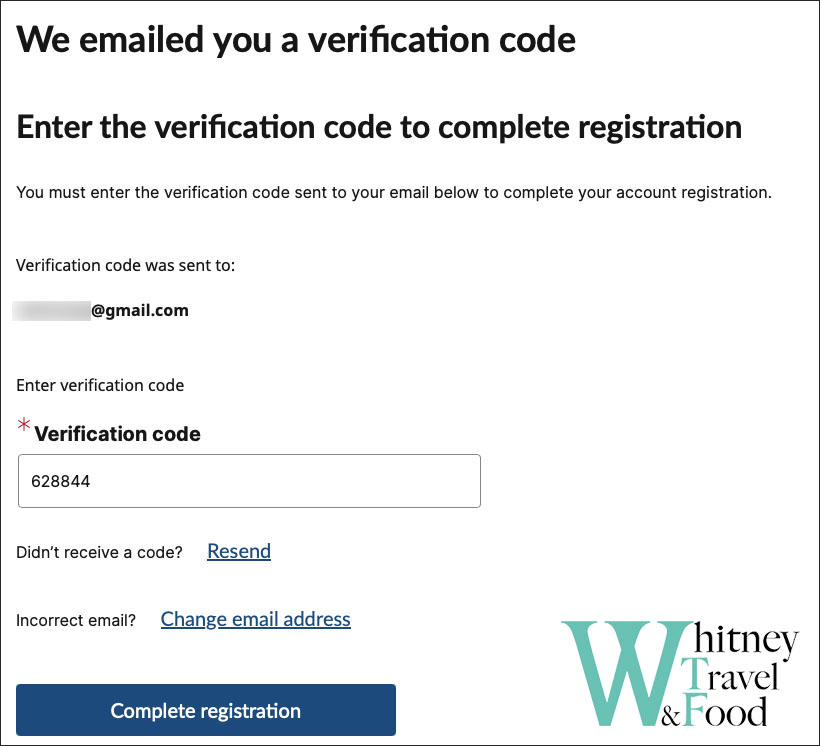
Create an Account
Once you access the website, if you already have an account, simply log in. If you do not have an account, create one. Ensure all personal information is entered accurately to avoid any issues with your application process.
First Login and Create an Application
Log in to the portal using the account and password you just created. Upon your first login, you will need to select an application form. Note that there are other PR programs available, aside from sponsorship. To apply for common-law partner sponsorship, follow the steps to choose the correct form as shown below.
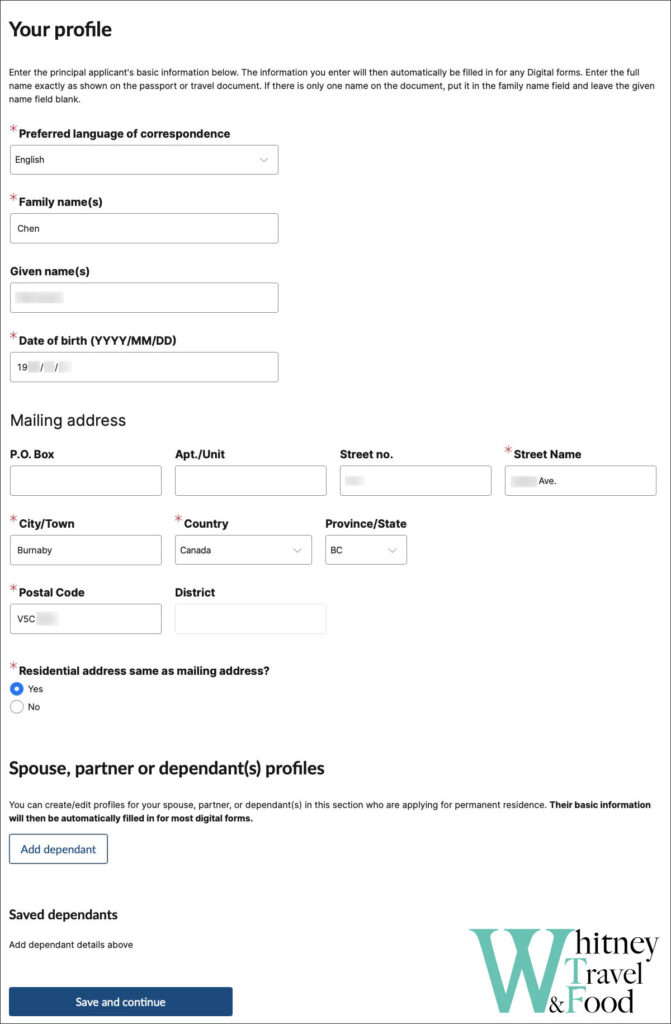
After selecting the form, complete the final page by entering your name, date of birth, address, and other personal details. Click Save and Continue, and the document upload portal will appear.
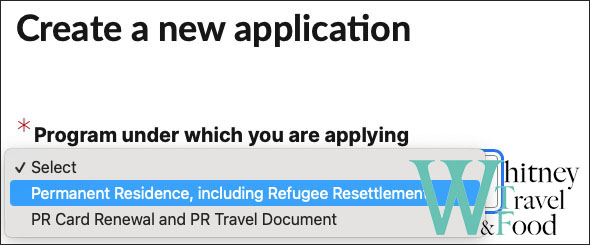

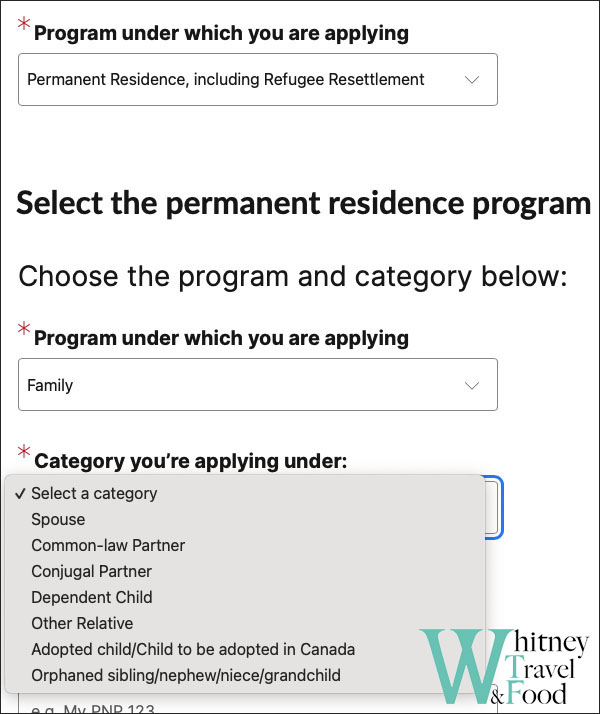
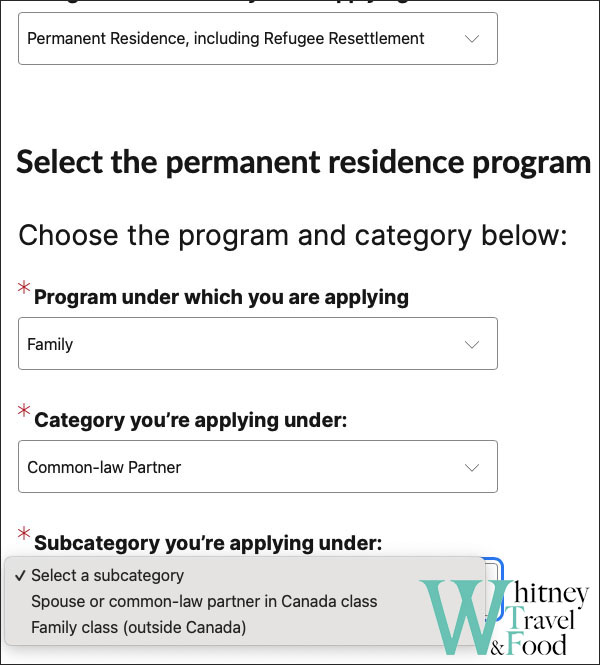
How to Prepare and Upload Documents
Once you access the dashboard, you’ll see a long list of forms to complete and documents to fill out and upload. Since requirements vary based on individual circumstances, the details provided here are based on my personal application experience. Please follow the instructions relevant to your situation when preparing and uploading documents.
Completing Online Forms
Filling out the forms can be time-consuming. You’ll need to list all countries you’ve lived in for the past 10 years (or since age 18), travel history, work experience, and detailed family information. Each section requires careful completion. It took me a lot of time, and I found the instructional videos from Hit Submit & Canada on YouTube very helpful in completing the forms step-by-step.
IMM 0008
IMM 5406
IMM 5669
IMM 5562
Filling and Uploading PDF Forms
After completing the online forms, there are additional PDF forms that you’ll need to fill out and upload. These forms are not too complicated to complete.
IMM 1344
This form must be filled out by the sponsor to determine their eligibility as a sponsor. If a co-signer is not applicable to your situation, you can leave that section blank.
IMM 5532
This form is also completed by the sponsor. It requires detailed personal information, employment history, residential addresses, and any past common-law experience. The final step involves providing an electronic signature, which may cause technical issues. You can refer to instructional videos below for troubleshooting tips to complete this step successfully.
IMM 5589
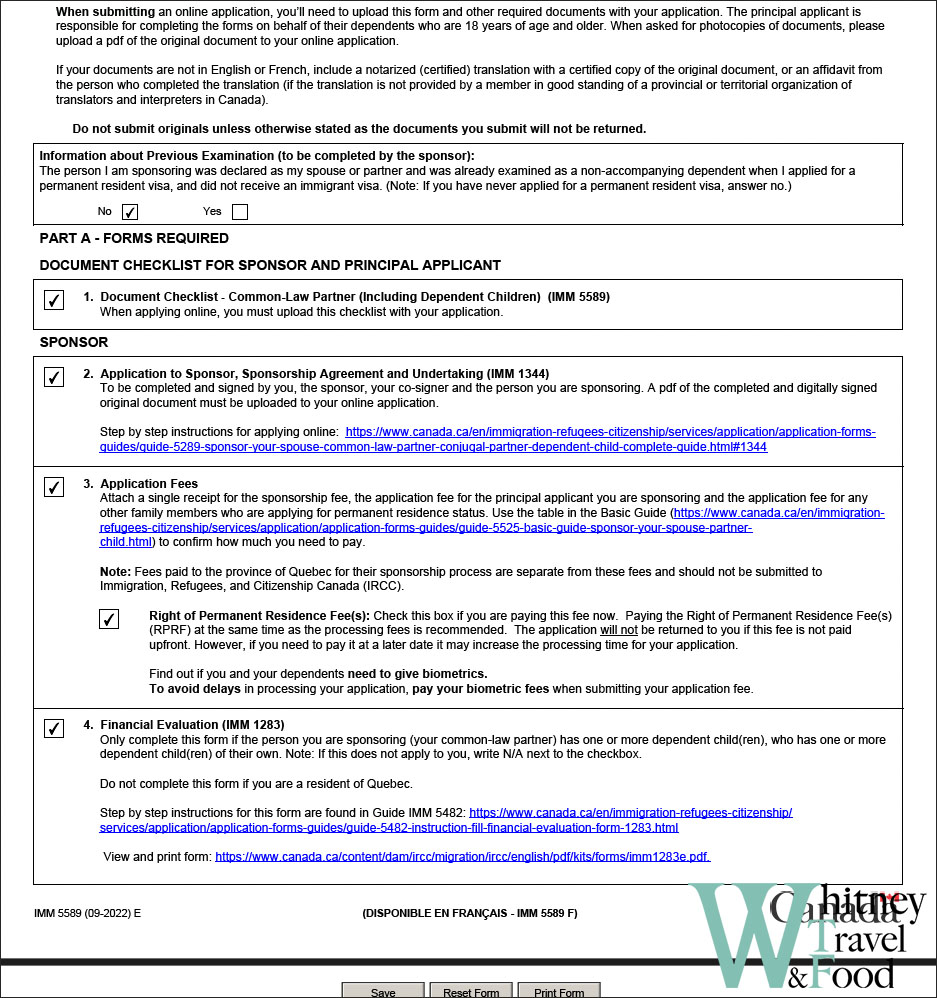
This document is extremely important — it is a Checklist that outlines all the required documents you need to upload and specifies whether any signatures are needed. As you complete each item, you can check it off in the box provided. Thanks to this checklist, we carefully reviewed all the information and discovered that we had missed signing in certain places.
Another important point is that, since everyone’s situation and conditions are different, the required documents will also vary. The dashboard lists the essential forms and PDF files that need to be completed and uploaded. If additional documents are required, such as the Financial Evaluation Form (IMM 1283) shown in the image below, it is only necessary to complete this form if the sponsored person has one or more dependent children, and those children also have their own dependent children.
Additional Application Forms
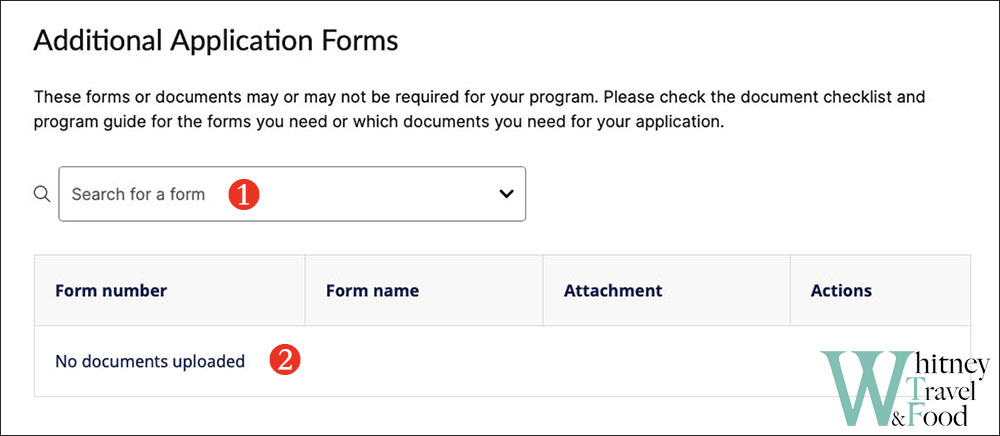
If additional application forms need to be submitted, you can do so easily:
- In the Search for a form field, enter the form number you need to submit, for example: 1283.
- The IMM 1283 upload form will then appear, and you can simply upload the PDF.
Supporting Documents
Before uploading files, please read the following:
If you have more than one document to upload under any one category, upload each one separately with a unique name (for example: Police_Certificate1, Police_Certificate2, Police _Certificate3).
- Use this naming convention to label your documents: “Last Name – First Name – Document type – #.” For example: “Wong – John – Proof of Education -1.”
- Accepted file types: PDF, JPG, JPEG, PNG, DOC, and DOCX
- Accepted file size: File size should be 4 MB maximum and photos should be 420×540 pixels minimum.
- Accepted characters for file names: File names can only contain the following characters: “A-Z”, “a-z”, “0-9”, “-“, “_”, “.”.
Travel Documents and Passports
This is simple; just scan and upload the page of your passport with personal details.
Police Certificates and Clearances
In addition to the police certificate from your place of residence, if you have lived in another country for more than 6 months, you will need to provide the police certificate from that country. Unfortunately, I worked in Ireland, the UK on a working holiday, and also in China, so I had to provide quite a few police certificates. Here’s how I applied for them.
I provided the police certificates I submitted for my working holiday application, which were generally fine. However, the Chinese police certificate required additional documentation. Obtaining a Chinese police certificate can be difficult for Taiwanese individuals (especially without a residence permit), so I wrote an explanatory letter via WebForm.
Photo(s)
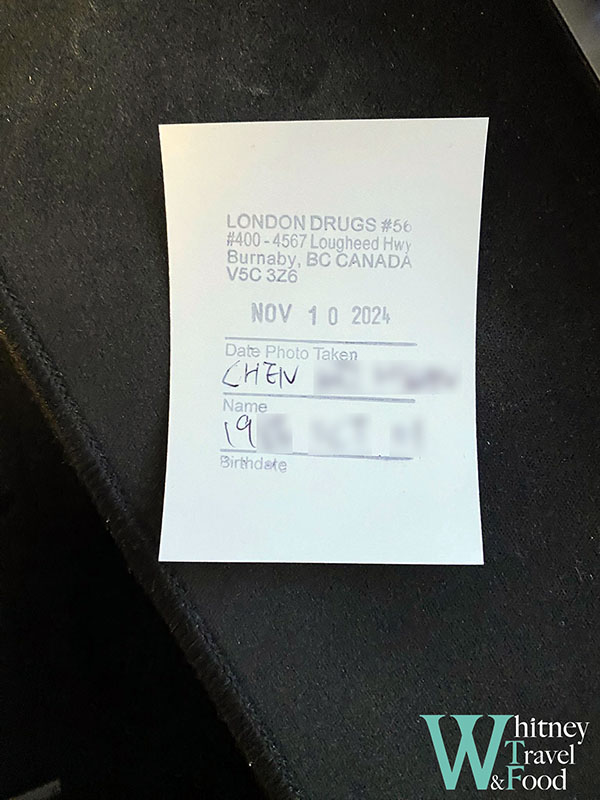
Please upload a PR photo. I went to London Drug to have it taken. After the photo was taken, the staff helped me check if it met the PR standards. The back of the photo will have the date and location of the photo session. The cost was CA$25.46, which includes 3 photos and the digital file. Simply upload the digital file. Additionally, take another photo of the back of the photo as shown in the example below, and upload it after capturing it.
Birth Certificates
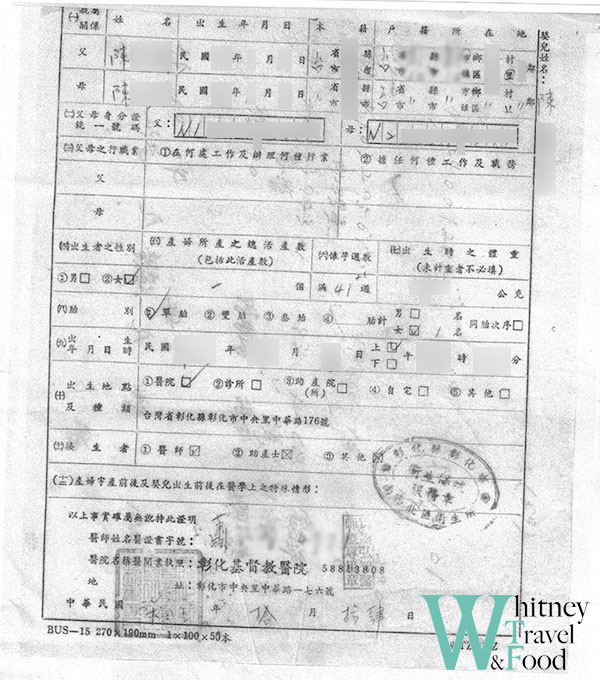
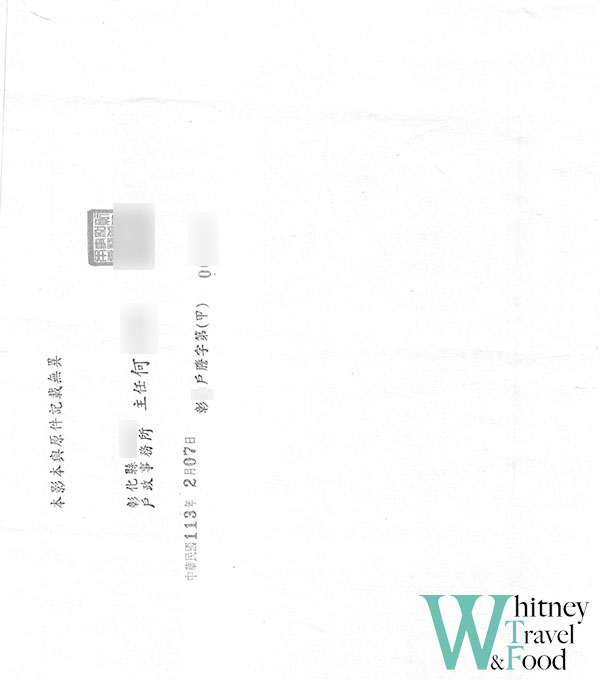
Initially, I submitted the hospital birth certificate since the hospital could provide an English version. However, I was later asked to submit additional documents because the hospital certificate was not accepted. They required an official government-issued birth certificate. So, I went to the Household Registration Office in Taiwan to obtain the birth certificate, but the certificate was only available in Chinese. I then had it translated by a certified translation company in Canada. I submitted both the original and the translated copy together.
Proof of Status
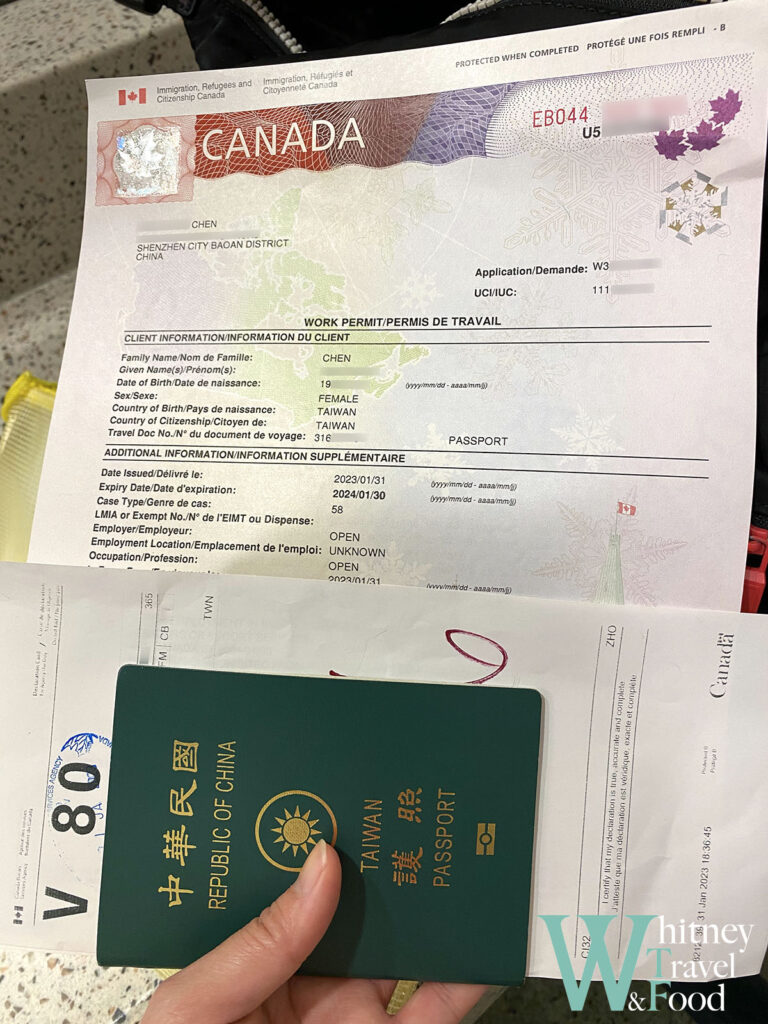
Upload your current identification documents in Canada, such as work permit, study permit, etc.
Additional Supporting Documents
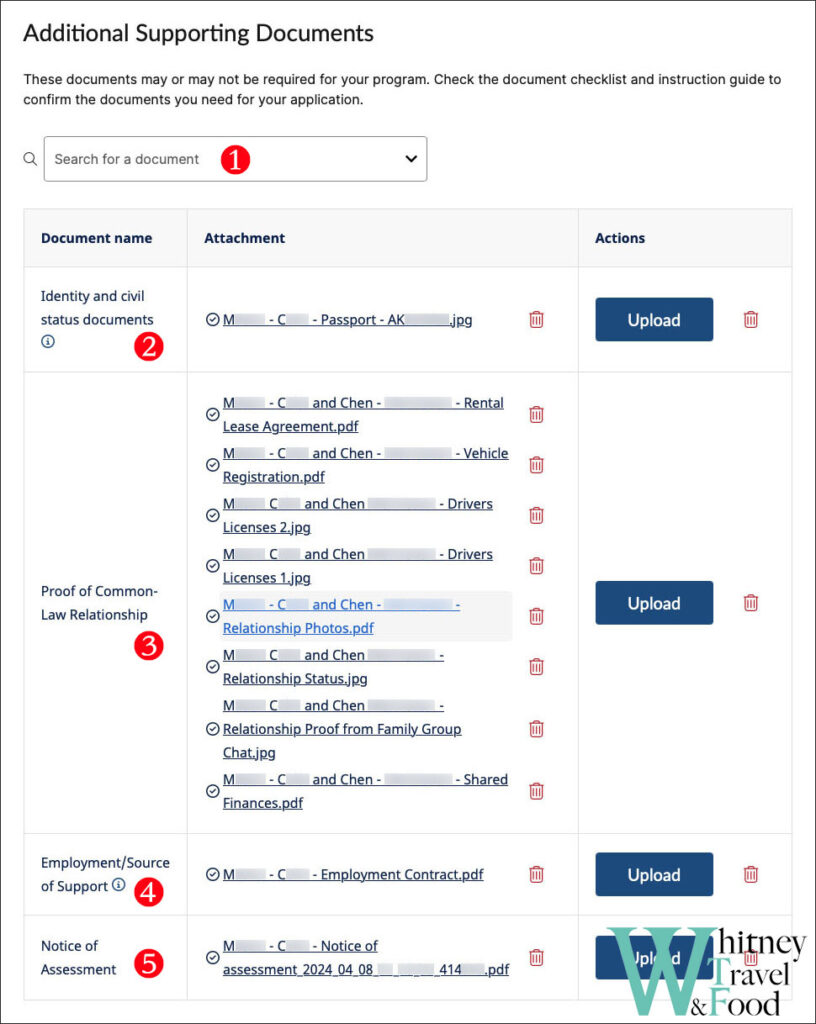
In addition to the basic documents mentioned above, you will need to upload additional proof of your common-law relationship. The required documents may vary depending on your personal situation, but here are the ones I uploaded, just for reference:
- In the Search for a document section, enter the document name you need to submit, and the form will appear for you to upload the information.
- Identity and civil status documents: Upload the sponsor’s passport, PR, or birth certificate, etc.
- Proof of Common-Law Relationship: This is straightforward; upload documents proving your relationship and proof of cohabitation for at least one year, etc. Additionally, you may need to submit photos taken during the relationship, with a maximum of 20 photos.
- Employment/Source of Support: The sponsor’s employment contract, etc.
- Notice of Assessment: The sponsor’s tax assessment for the previous year, which can be downloaded from the CRA system.
Paying the Application Fees
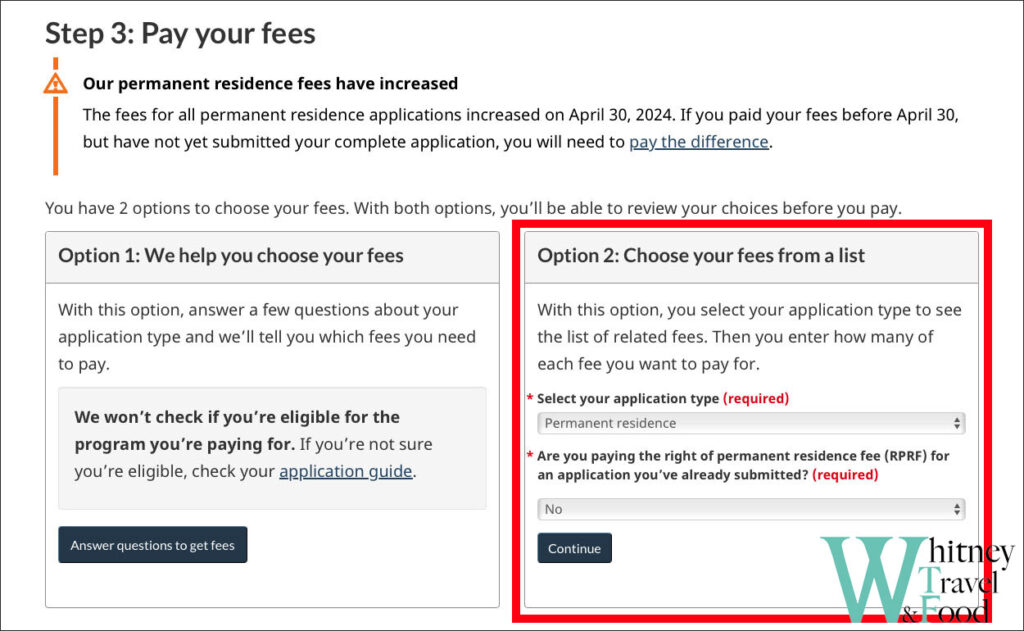
Here, you will need to upload the receipt of your PR application fee payment. Please make the payment through the Pay your application fees online.
- Once you access the website, scroll down to the bottom to Step 3, where you will find two options to choose the fees. I personally selected Option 2 to view the fee list.
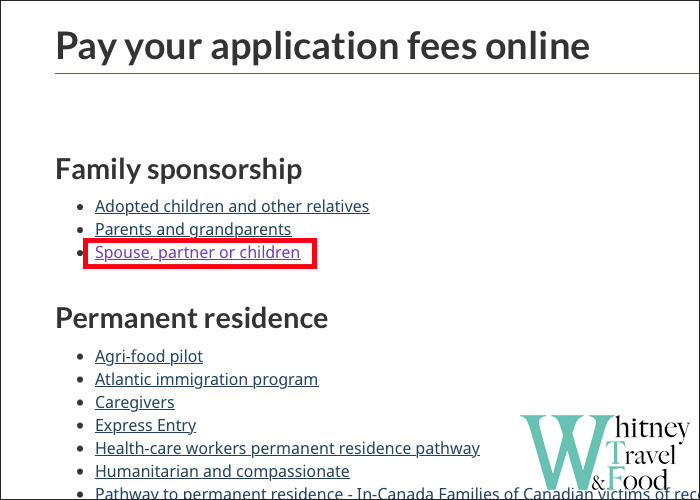
- Select Spouse, partner, or children.
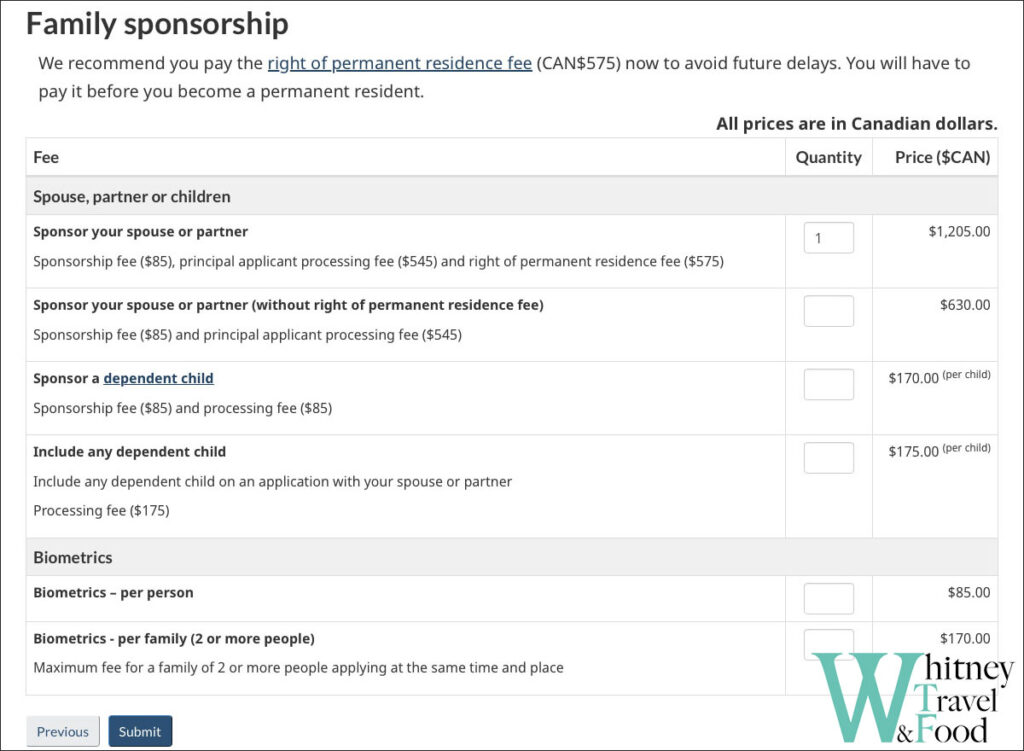
- When choosing the payment items, I only paid for the Sponsor your spouse or partner fees. Later, I was asked to pay the biometric fees as well. Even if you have completed biometrics during your working holiday visa application and it is still within the 10-year validity, you are still required to do biometrics again when applying for PR.
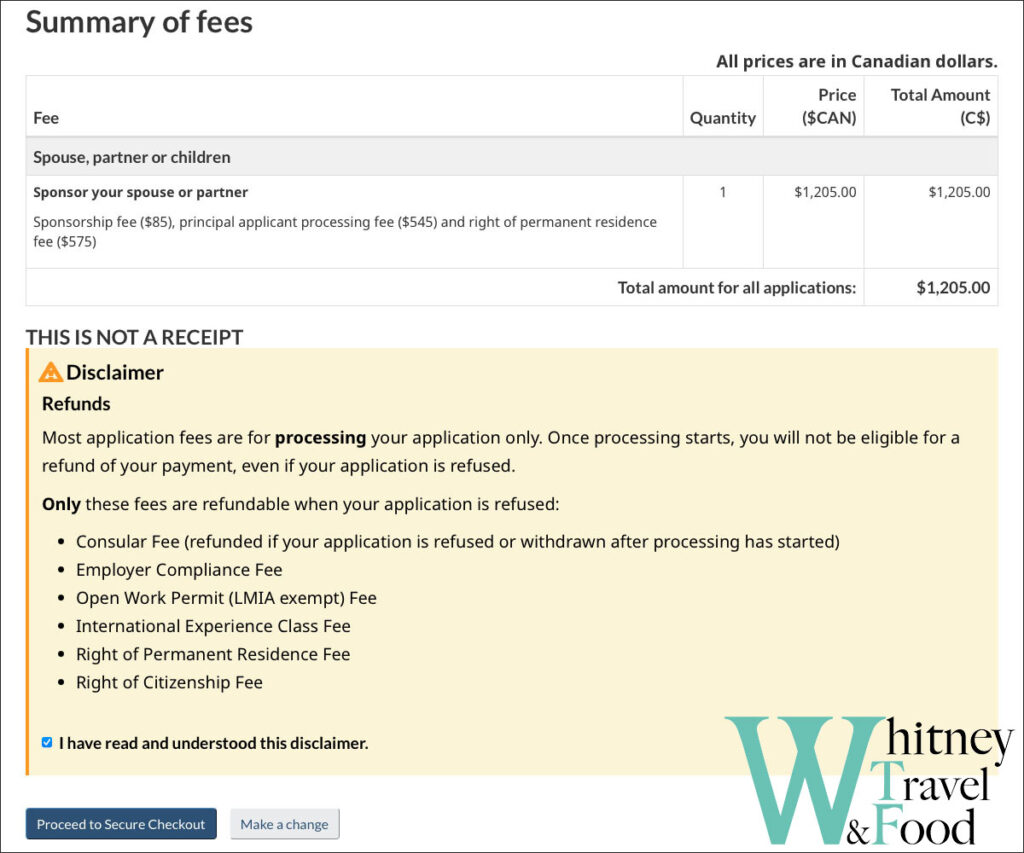
- Before you reach this page, you need to log in to your account. If you don’t have an account, you’ll need to register one before proceeding. Once you confirm the fee amount, click Proceed to Secure Checkout.
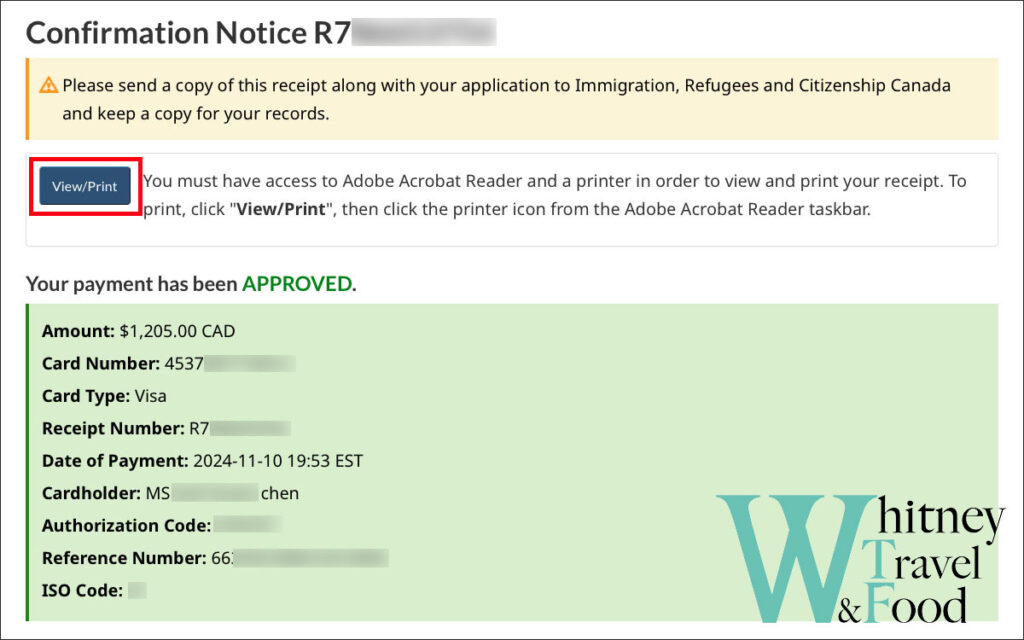
- After the payment is successful, the page will display a confirmation. Click on the red box labeled View/Print to download the receipt. Upload the receipt to dashdoard.
Declaration & Submit
The last step is the declaration. Essentially, you just need to read through the documents and then electronically sign them. It’s not too complicated.
Before submitting your application, be sure to review all the information in the dashboard. Open the IMM 5589 form and cross-check everything to ensure there is no missing information or signatures. Also, make sure to download and check the uploaded PDF files to verify they contain the correct content — don’t accidentally upload a blank form.

Once everything is checked and verified, click on Submit application! This will complete your application process! Now, you just need to wait for IRCC’s review.
How to Track Your Application Progress
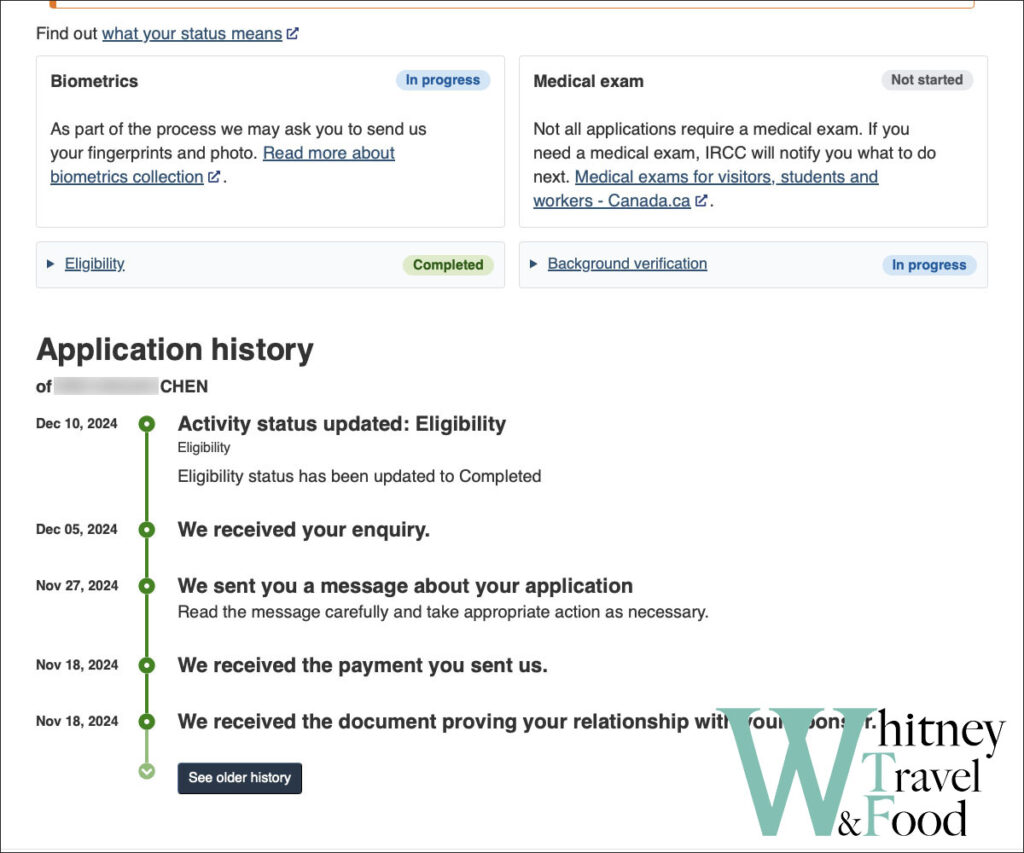
During the application process, if you receive your IRCC application number and UCI (Unique Client Identifier), you can use the Application Status Tracker to monitor your application status. Simply enter your application number and UCI into the tracker to check the progress of your application.
How to Extend Work Permit?
If your current work permit is about to expire before receiving the results of your common-law spouse’s PR application, you can apply for a work permit extension. According to IRCC, the processing time for a work permit extension is about 151 days, but mine was approved in just 2 weeks. Since the processing time for PR as a common-law spouse is getting longer, it’s advisable to extend your work permit in advance to avoid losing your legal work status in Canada.
Sign In to the GCKey Account
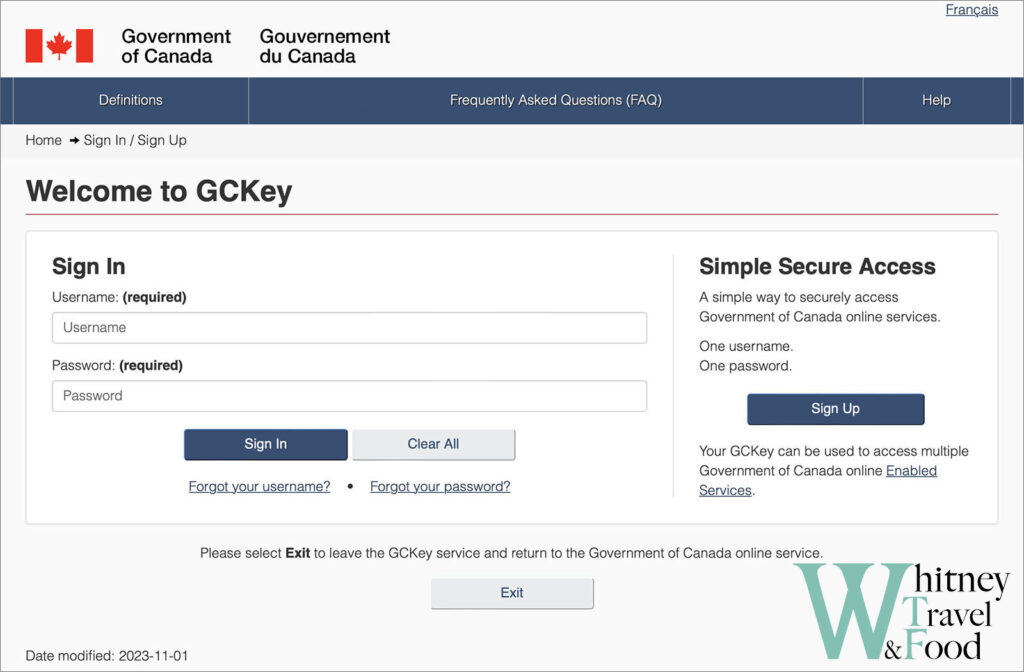
Go to the IRCC website and sign in to your GCKey account. If you previously applied for a Working Holiday Visa, you should already have an account. If not, you can create a new account on the same platform.
Select the Work Permit Extension Application Form
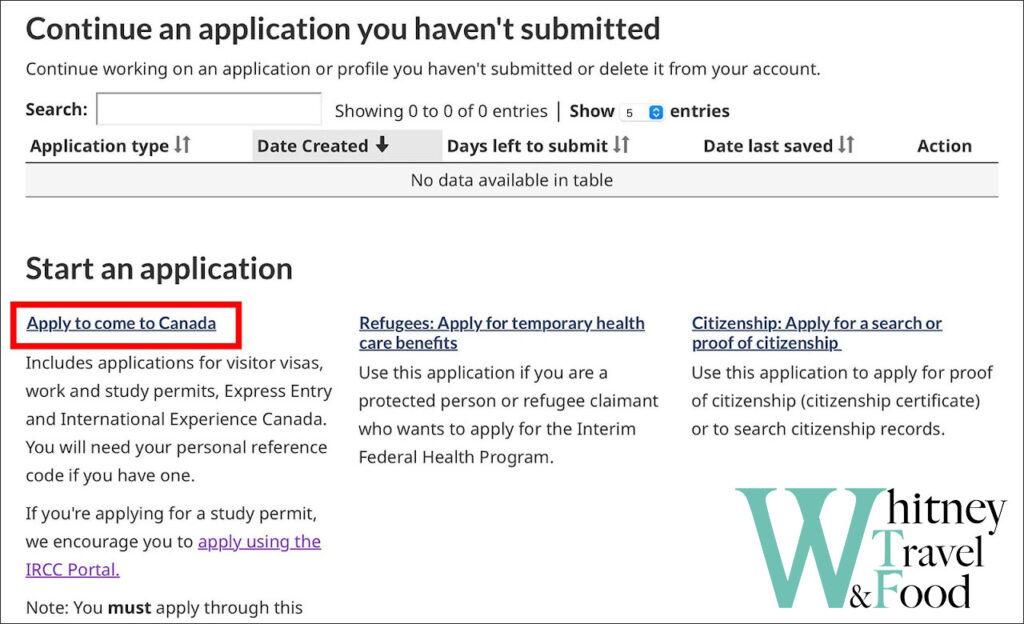
After logging into the dashboard, you will first see your previous visa application records. Scroll down, and you will find the option Apply to come to Canada. Proceed to the next page and select Visitor visa, study and/or work permit.
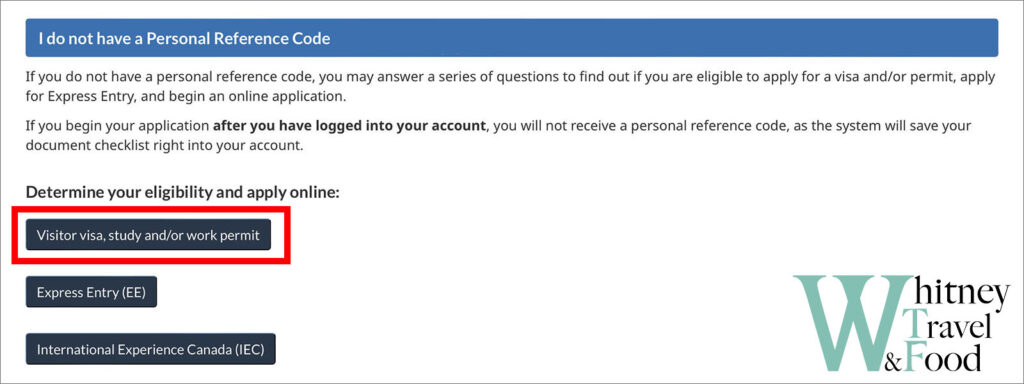
You will need to answer a lot of questions based on your personal situation. Your responses will determine the outcome. If everything goes as expected, you should be able to access the dashboard for the work permit extension.
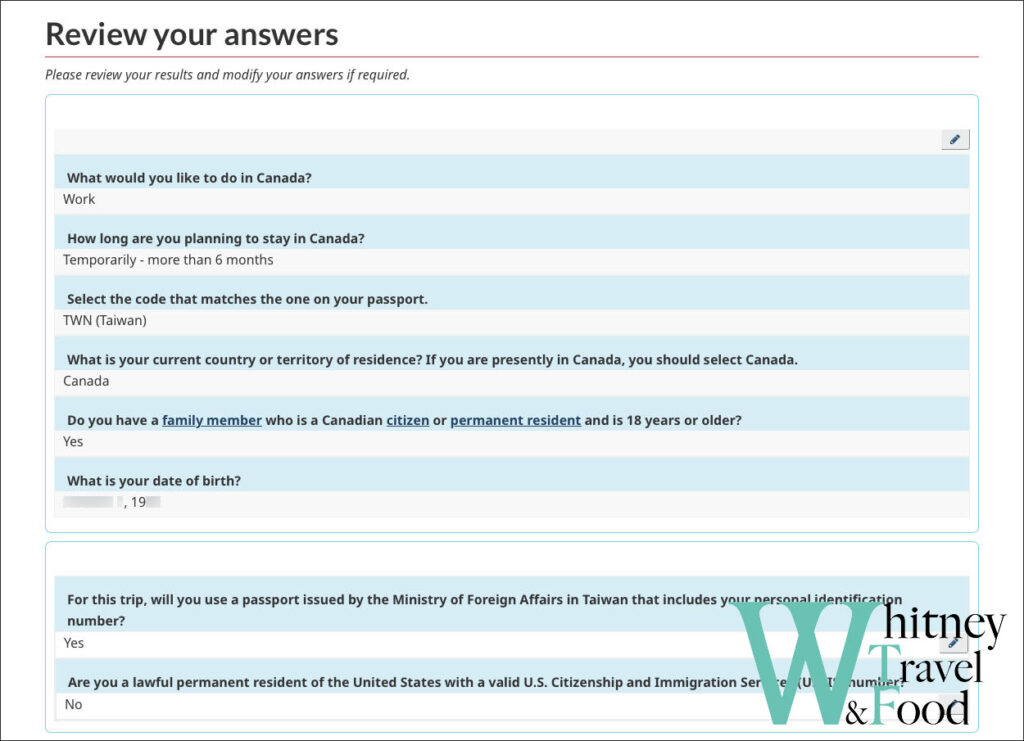
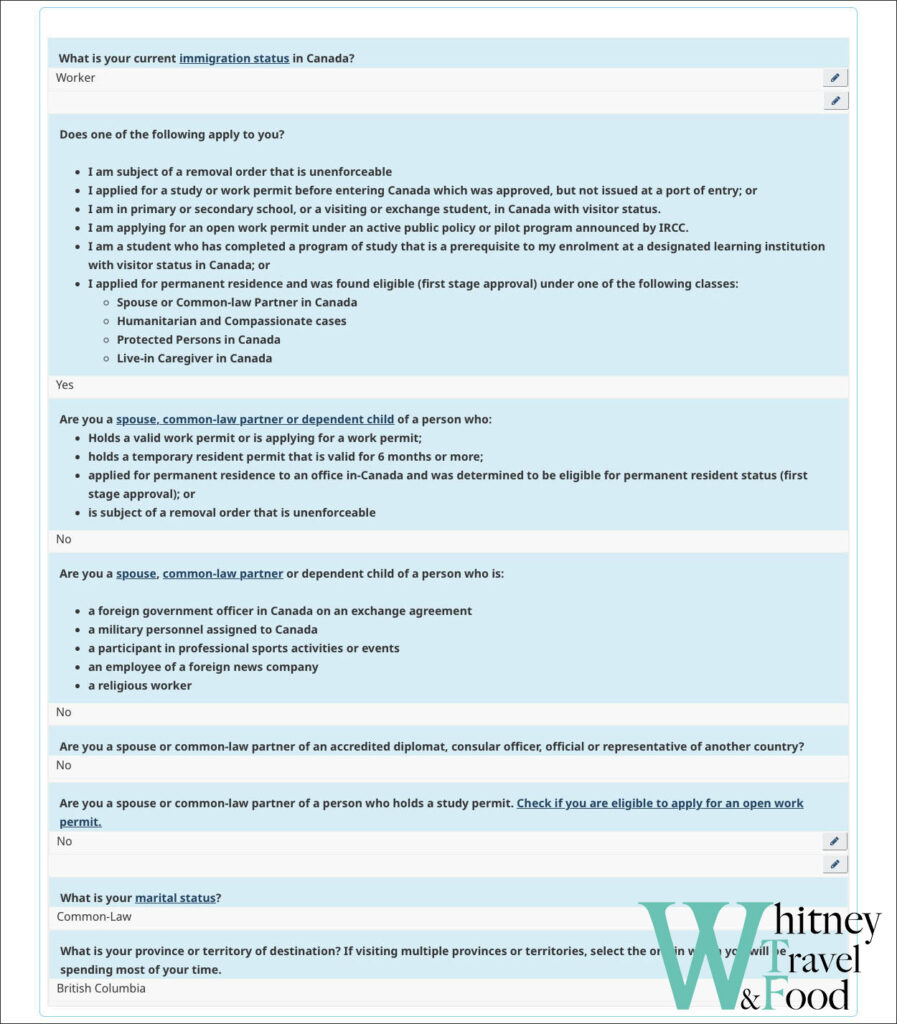
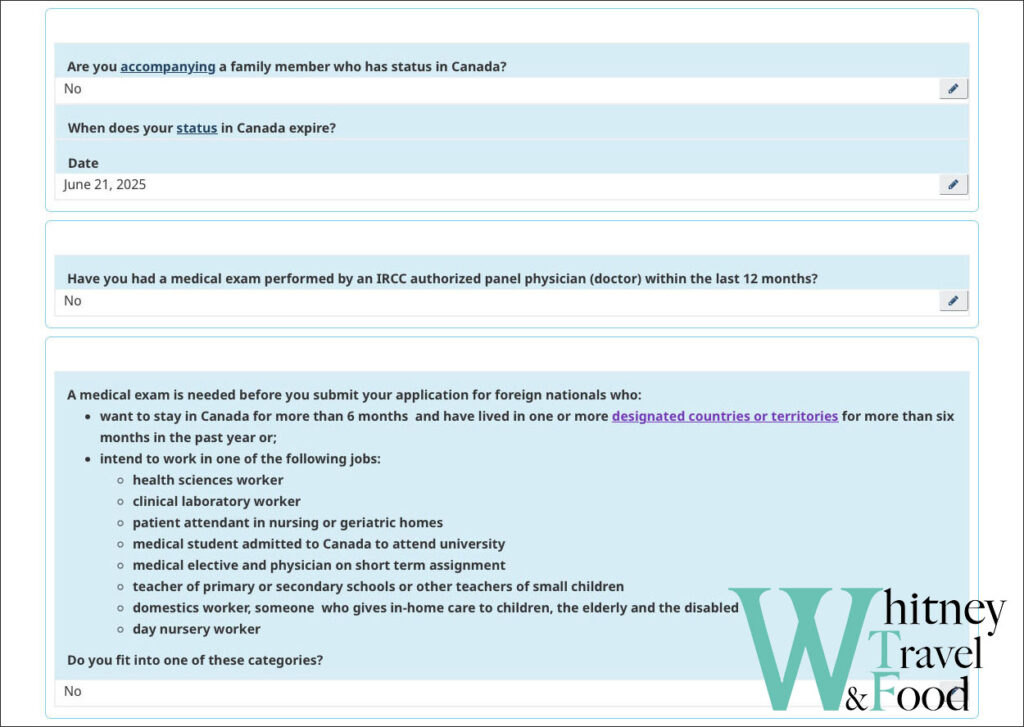
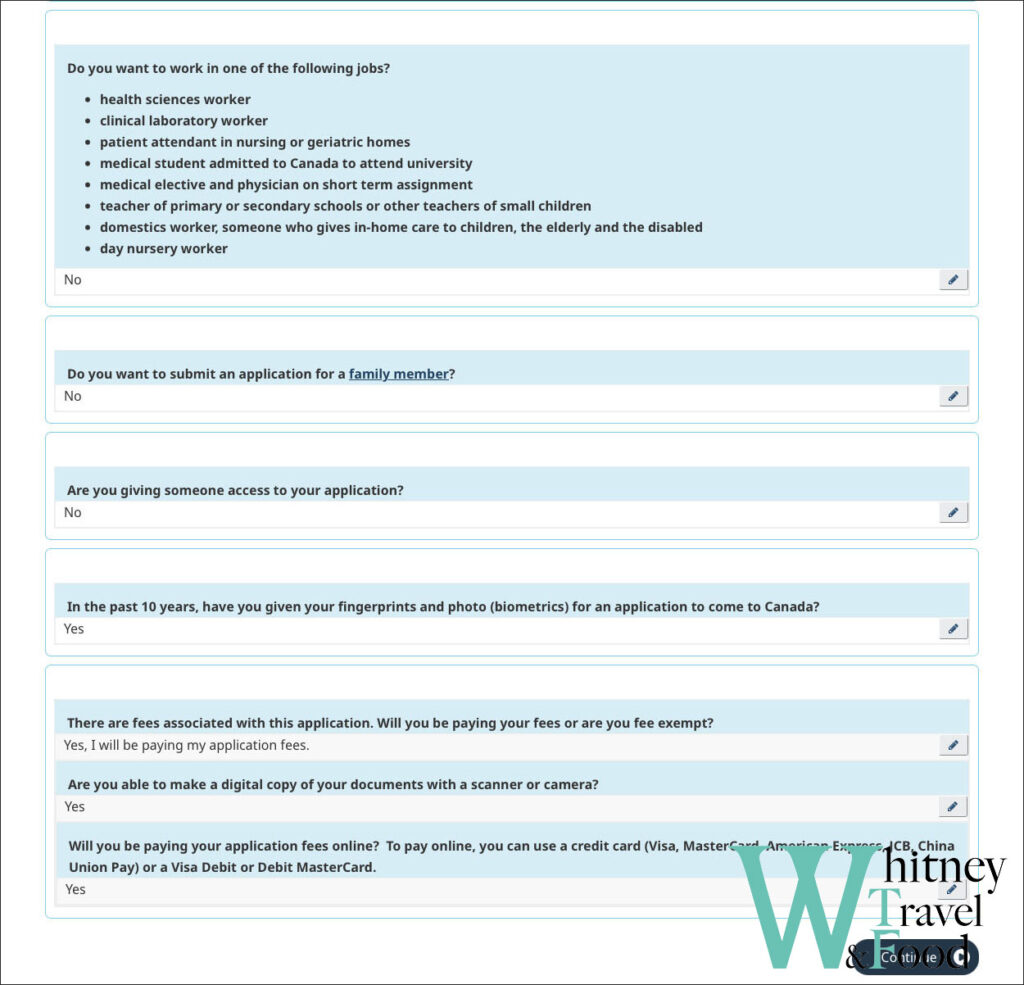
Document Upload and Make a Payment
The required documents for upload are as follows:
- Passport: Scan and upload the page of your passport with personal details.
- Photo(s): Use the same photo from your PR application.
- imm5710e: Download the PDF from the IRCC website, fill in the required information, sign electronically, and click Validate to generate the barcode. Save and upload the completed file.
- Additional Document (Optional): To be safe, I also uploaded the PDF confirming my eligibility for the common-law partner PR application.
Once all documents are uploaded, you can proceed to pay the CAD 255 fee and submit your work permit extension application.
After approval, the new work permit will be mailed to the designated address. Don’t forget to bring your new work permit to Service Canada to update your SIN.
Timeline
- 2023/11/1 – Moved in with my boyfriend officially.
- 2024/11/1 – Celebrated one year of living together, began preparing application documents, and updated CRA status to “Common-Law.”
- 2024/11/10 – Submitted application documents.
- 2024/11/11 – IRCC received application documents.
- 2024/11/17 – Received application number and requested additional documents.
- 2024/12/3 – Requested additional biometrics fee.
- 2024/12/4 – Paid biometrics fee and submitted additional documents via Webform.
- 2024/12/10 – Eligibility
- 2025/1/14 – Applied for work permit extension
- 2025/1/28 – Work permit extension is approved and expires on 2027/1/27
- 2025/1/31 – Biometric Instruction Letter
- 2025/2/14 – Visit Service Canada for biometrics
- 2025/6/18 – Submitted change of address via webform due to moving.
- 2025/7/14 – Application status shows: Address change successful
- 2025/7/26 – Submitted a webform inquiry to ask whether a medical exam was required, and attached the IME number from the medical exam done during my previous Working Holiday application.
- 2025/7/30 – IRCC replied that We verified the information on file and can confirm that the responsible office did not send a request for you to provide medical examination results yet. In the meantime, we are pleased to inform you that everything appears to be in order with the application.
- 2025/11/8 – Medical exam status has been updated to Completed
- 2026/1/14 – Background verification status has been updated to Completed
Currently, my common-law partner application is still in process, and I hope to complete it before the end of 2025. If anyone else is also waiting for their common-law partner application, feel free to leave a comment below to share and discuss experiences!
Related Posts
-
Working Holiday in Canada (1) Eligibility & How to Apply -
Working Holiday in Canada (2) How to fill out the IEC form application -
Working Holiday in Canada (3) Collect Biometrics in Canadian Visa Application Center in China -
Working Holiday in Canada (4) Proof of Upfront Medical Exam -
Working Holiday in Canada (5) Arrive Canada and Collect Open Work Permit -
How to Apply Study Permit in Canada before Working Holiday Visa expires? -
How to Exchange Driver License Address BC in Canada as a Reciprocal License Holder? -
Apply for Evo Car Share with Non-BC Driver’s License in Vancouver -
How to Apply for MSP in Vancouver BC and Pay for MSP Fees? -
How to Apply for PR as a Common-Law Spouse in Canada -
Working in Canada: How to Apply for a Social Insurance Number (SIN) & File Your First Tax Return with the CRA
Thank you for reading!
If you like my post🖋️
Feel free to buy me a coffee☕️
Your support is our motivation for creating!🥰


