If you plan to work in Canada and have already obtained a work permit/study permit, don’t forget to apply for a Social Insurance Number (SIN). Once you successfully begin working in Canada, you can register for a CRA (Canada Revenue Agency) account and file your taxes legally by the end of April the following year.
Applying for a Social Insurance Number (SIN)
The Social Insurance Number (SIN) is a 9-digit number issued by the Canadian government. It’s used to identify individuals for tax purposes, employment, and access to government benefits. In short, it’s a crucial piece of personal identification—similar to a national ID number.
Who Needs to Apply for a SIN?
You should apply for a SIN if you fall into any of the following categories:
- International students who are eligible to work off-campus
- Working Holiday visa holders
- New immigrants or Permanent Residents (PR)
- Temporary residents with a valid work permit (including spousal open work permits)
- Anyone earning employment income in Canada
How to Apply for a SIN
You can apply for a SIN by mail, online or in person at a Service Canada office.
Online
- Go to the Apply, update or obtain a SIN confirmation page.
- Scroll down the page, select the appropriate application option, and click the green Apply online button to begin filling out your personal information.
- Upload the required documents (PDFs or clear photos are both accepted).
- Wait for the application to be reviewed (usually takes 5–10 business days).
- Once approved, your SIN will be sent to you either by email or to your mailing address.
By Mail
- Mail the application form and supporting documents to the designated address.
- The processing time may take several weeks.
- It’s recommended to use registered mail and keep photocopies of all your documents for your records.
In Person
Please first check the nearest Service Canada location to you, and then make sure to have the following documents ready before heading there:
- Original passport
- Visa: Work Permit, Study Permit, etc.
- Phone number
- Address: A temporary address is acceptable. No items will be mailed to this address if confirmed with the staff.
- Parents’ names in English
 & File Your First Tax Return with the CRA 1")
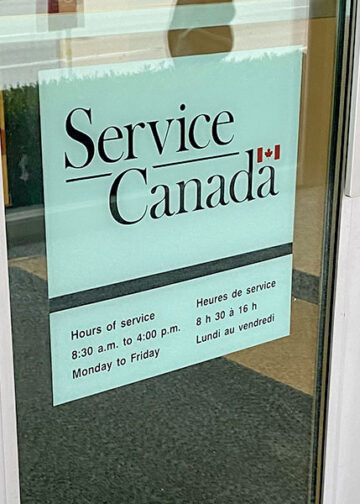
I chose a Service Canada location that’s closest to me, but it looks pretty out of the way. Before heading there, make sure to check the service hours to avoid making a trip for nothing.
 & File Your First Tax Return with the CRA 2")
Once you enter, you’ll need to wait in line. At the counter, they’ll first ask if you have an appointment and what you’re there for. Then, they’ll give you a note with your information written on it, and you’ll go to the side to wait for your number to be called.
 & File Your First Tax Return with the CRA 3")
There weren’t many people waiting that day, maybe just under 10, but I still had to wait about half an hour. After that, a staff member called my name, asked if it was my first time applying for a SIN, and then showed me some important information. They also warned me not to give my SIN to strangers, as doing so could result in it being deactivated.
 & File Your First Tax Return with the CRA 4")
In the end, you’ll receive a paper with your SIN number on it. Make sure to keep it safe, as you’ll need it when applying for jobs. The SIN’s validity is tied to your work permit or study permit, meaning the paper will expire one year after issuance.
Updating SIN Information
After you’ve received your SIN, if you want to check your SIN details, you can create an account on My Service Canada Account (MSCA) to view the current validity and status of your SIN.
If you’re a temporary resident in Canada, your SIN will start with a 9 and will eventually expire. If you’ve applied for an extension or switched to a study permit, for example, remember to go to Service Canada to update the SIN expiration date.
If you prefer not to visit Service Canada in person, you can also update your SIN online via Apply, update or obtain a SIN confirmation.
- To update your SIN: Go to the webpage and scroll down, then select the appropriate option (such as “You are applying for yourself”), and click the green Apply Now button to start the process.
- When selecting the option: If you are updating your SIN, make sure to select the option indicating that you previously had a SIN, as shown in the image below. Finally, upload the latest version of your visa or PR document in electronic format, and your application will be complete.
 & File Your First Tax Return with the CRA 5")
 & File Your First Tax Return with the CRA 6")
How to File Your First Tax Return with the CRA
After a year of hard work, tax season finally arrives. If it’s your first time filing taxes in Canada, you won’t be able to register for a CRA account right away—you’ll need to file your return using a certified software instead.
Deadlines
- April 30 – Regular filing deadline (if you earned income)
- June 15 – Deadline for self-employed individuals to file, but any taxes owed must still be paid by April 30
What You’ll Need to Prepare Before Filing?
- SIN (Social Insurance Number): Essential for tax filing. Your employer also uses this number to report your income.
- T4 Slip: Provided by your employer, this shows your total income and taxes deducted for the year.
- T2202 Slip: Provided by your school if you paid tuition—used to claim education-related credits.
- T5 Slip: Issued by your bank if you earned interest income.
- Rent Receipts: In some provinces, you can claim a tax credit for rent paid.
- Immigration Documents / Date of Entry: If you’re a newcomer, your date of arrival determines your tax residency period for the year.
 & File Your First Tax Return with the CRA 8")
 & File Your First Tax Return with the CRA 9")
 & File Your First Tax Return with the CRA 10")
 & File Your First Tax Return with the CRA 11")
Ways to File Your First Tax Return in Canada?
Paper Filing
- Download the T1 General form from the CRA website
- Fill it out by hand or on your computer, then print it
- Include photocopies of all supporting tax documents
- Mail everything to the address specified by the CRA
- Best for: Total beginners, low-income earners, or those who want to learn how to fill out the forms themselves
Tax Software
- Some software (like Wealthsimple Tax or StudioTax) support first-time filers; these programs walk you through the process and help you complete your T1 return
- From the second year onward, you can use CRA Netfile to submit online directly
- Tip: Choose software that’s user-friendly and offers free filing options
- Best for: People who want to file themselves with guided support
Accountant / Tax Filing Services
- Professional tax services use the CRA’s EFILE system
- It’s fast and convenient, but usually comes with a fee
- Best for: Those with complex income, self-employment, or who are worried about making mistakes
- Common services: H&R Block, Liberty Tax, or independent accountants
Free Community Tax Clinics (CVITP)
- A government-supported volunteer program offering free tax help, find a location or make an appointment here: Free Tax Clinics
- Best for: Low-income individuals, students, or new immigrants
- In Vancouver, the Vancouver Chinese Library hosts volunteer-run tax clinics each year—check their Facebook page for the latest schedule.
How to File Your First Canadian Tax Return Using Tax Software
If your taxes are relatively simple, using an online tax software is a great option. It’s free, fast, and everything can be done online—including filing your return and registering for a CRA account. Among the many available tools, I personally used Wealthsimple. It’s super easy to navigate and clearly shows how much you’ll get as a refund or how much you owe.
If you want to use Wealthsimple for your first tax return, here’s a step-by-step guide:
Step 1: Go to the Website
- Visit the Wealthsimple Tax website
- Click Start filing to create a new account, or Log in if you already have one.
 & File Your First Tax Return with the CRA 12")
Step 2: Create an Account
- Sign up using your email address and phone number.
- The sign-up process is simple and quick.
 & File Your First Tax Return with the CRA 13")
 & File Your First Tax Return with the CRA 14")
Step 3: Create a New Profile
- Follow the steps to create your tax profile.
- Enter your full name and select the year you’re filing taxes for.
- Choose the Basic plan—it’s free.
 & File Your First Tax Return with the CRA 15")
 & File Your First Tax Return with the CRA 16")
 & File Your First Tax Return with the CRA 17")
Step 4: Enter Your Tax Info
Prepare your tax slips and documents, then begin entering your information step-by-step.
About You
Fill out your personal details honestly.
 & File Your First Tax Return with the CRA 18")
Auto-fill & add forms
If you’ve filed taxes before, you can import your previous tax information directly from the CRA into the software. However, if this is your first time filing taxes in Canada, you can skip this step—there won’t be any data to import yet.
 & File Your First Tax Return with the CRA 19")
Personal information
Next, you’ll need to fill in your personal information. Make sure to answer truthfully based on your specific situation—your responses may affect your refund amount.
In the section marked with a red arrow, enter the date you first started living in your current province. For example, if you entered Canada with a Working Holiday Visa and have been living in British Columbia since arrival, just enter the same date as shown on your visa.
 & File Your First Tax Return with the CRA 20")
 & File Your First Tax Return with the CRA 21")
 & File Your First Tax Return with the CRA 22")
Manage tax forms
- Use the Manage Tax Forms section to enter your T4 details
- You can also search and add other forms like T5 or T2202 in the Search to add forms bar
 & File Your First Tax Return with the CRA 23")
Step 5: Submit Your Tax Return
Once everything’s filled out, preview your return to double-check all your info:
- Warnings: Review any warnings (e.g., missing address—important for CRA mail or refund cheques)
- Plan option: You can enter $0 if you want to use the free version
- Confirm your info: Double-check all your info
- Submit: Once you see the confirmation screen, your tax return has been successfully submitted!
 & File Your First Tax Return with the CRA 24")
 & File Your First Tax Return with the CRA 25")
 & File Your First Tax Return with the CRA 26")
 & File Your First Tax Return with the CRA 27")
Step 6: Download Your T1 PDF
After successful submission, download your T1 PDF file—you’ll need this for future reference or to apply for a CRA My Account.
 & File Your First Tax Return with the CRA 28")
 & File Your First Tax Return with the CRA 29")
If Submission Fails…
If you get an error when submitting, it may be because you’ve lived in Canada for less than 183 days, or due to another technical reason. In this case:
- If you’re on a budget, you can also check out free volunteer tax clinics (CVITP) for support!
- Consider hiring a professional accountant or tax service that uses CRA’s EFILE system for a more reliable filing.
How to Apply for a CRA Account?
Once you’ve finished filing your taxes and received your T1 tax return, you can go ahead and apply for a CRA My Account. The process is simple and straightforward:
Step 1: Go to the CRA Website
First, visit the Canada Revenue Agency (CRA) website, and click on Sign in to a CRA account to begin your registration.
 & File Your First Tax Return with the CRA 30")
Step 2: Choose a Sign-in Option to Registration With
- Sign-In Partner: Use your existing online banking account (e.g., RBC, TD, Scotiabank) to register and sign in to CRA My Account.
- CRA user ID and Password: Create a CRA account directly by setting up your own user ID and password.
- Provincial partner (BC, AB): Use a BC Services Card (with digital ID feature activated) or Alberta.ca Account to register and sign in.
If your work permit will eventually expire and you plan to close your Canadian bank account before leaving the country, it may be better to use the CRA user ID and password option.
 & File Your First Tax Return with the CRA 31")
Step 3: Verify Your Identity
Regardless of which sign-in option you choose, you’ll need to verify your identity. Open your T1 PDF file, and follow the prompts to enter the correct numbers:
- Line 15000: Find the value listed on line 15000 of your T1 and enter it (no need to include decimals).
- Line 10100: Same here—find the number listed on line 10100 and enter it.
 & File Your First Tax Return with the CRA 32")
 & File Your First Tax Return with the CRA 33")
Step 4: Choose MFA (Multi-Factor Authentication)
Choose your preferred MFA options. Using an Authenticator App (like Google Authenticator) is often the most convenient.
 & File Your First Tax Return with the CRA 34")
Step 5: Verification Options
This step is crucial—verifying your identity is the key to activating your CRA account.
- Use a government-issued ID (this may not always work; it failed for me multiple times).
- CRA security code by mail — slightly more time-consuming, but more reliable if Option 1 doesn’t work.
 & File Your First Tax Return with the CRA 35")
Step 6: Request the CRA Security Code
If you choose to have the security code mailed to your home address, make sure to click the link in the red box on the screen.
I missed this step the first time and just clicked Next, then waited at home for almost a month without receiving anything. I later realized I hadn’t actually requested the code.
 & File Your First Tax Return with the CRA 36")
After submitting your information, just wait for the letter. It usually takes about 5 to 10 business days to arrive.
 & File Your First Tax Return with the CRA 37")
 & File Your First Tax Return with the CRA 38")
Step 7: Activate Your CRA Account
Once the letter arrives, it will include your CRA security code. Log in to your CRA account and enter the code to fully activate your account.
 & File Your First Tax Return with the CRA 39")
 & File Your First Tax Return with the CRA 40")
 & File Your First Tax Return with the CRA 41")
After you enter the security code, you’ll see a confirmation screen—this means your CRA My Account is successfully set up! You can now check your refund status, update your personal info, or enter your banking details to get your tax refund via direct deposit.
 & File Your First Tax Return with the CRA 42")
First Tax Refund
For your first tax refund, the CRA usually sends a cheque by mail to your registered address. Once you receive it, just bring it to your bank to deposit.
 & File Your First Tax Return with the CRA 43")
And that’s it! That’s how you apply for a SIN and file your first tax return in Canada. Most of the process can be done online, and even if you need to go in-person, it won’t take much time. Canada is very friendly and supportive toward temporary residents and newcomers, and most processes come with clear and detailed steps—so don’t worry, it’s not as hard as it sounds!
Related Posts
Thank you for reading!
If you like my post🖋️
Feel free to buy me a coffee☕️
Your support is our motivation for creating!🥰
 & File Your First Tax Return with the CRA 44")
 in Vancouver: Big Way Richmond 45")


